You can get rid of headlight oxidation by carefully sanding the lens to strip away the damaged, yellowed layer. After that, you polish the surface back to a crystal-clear shine and finish by applying a UV-resistant sealant to keep it from happening again. This can be a great weekend DIY project, or you can call in a professional detailer for a perfect finish.
Why Your Headlights Look Foggy and What to Do About It
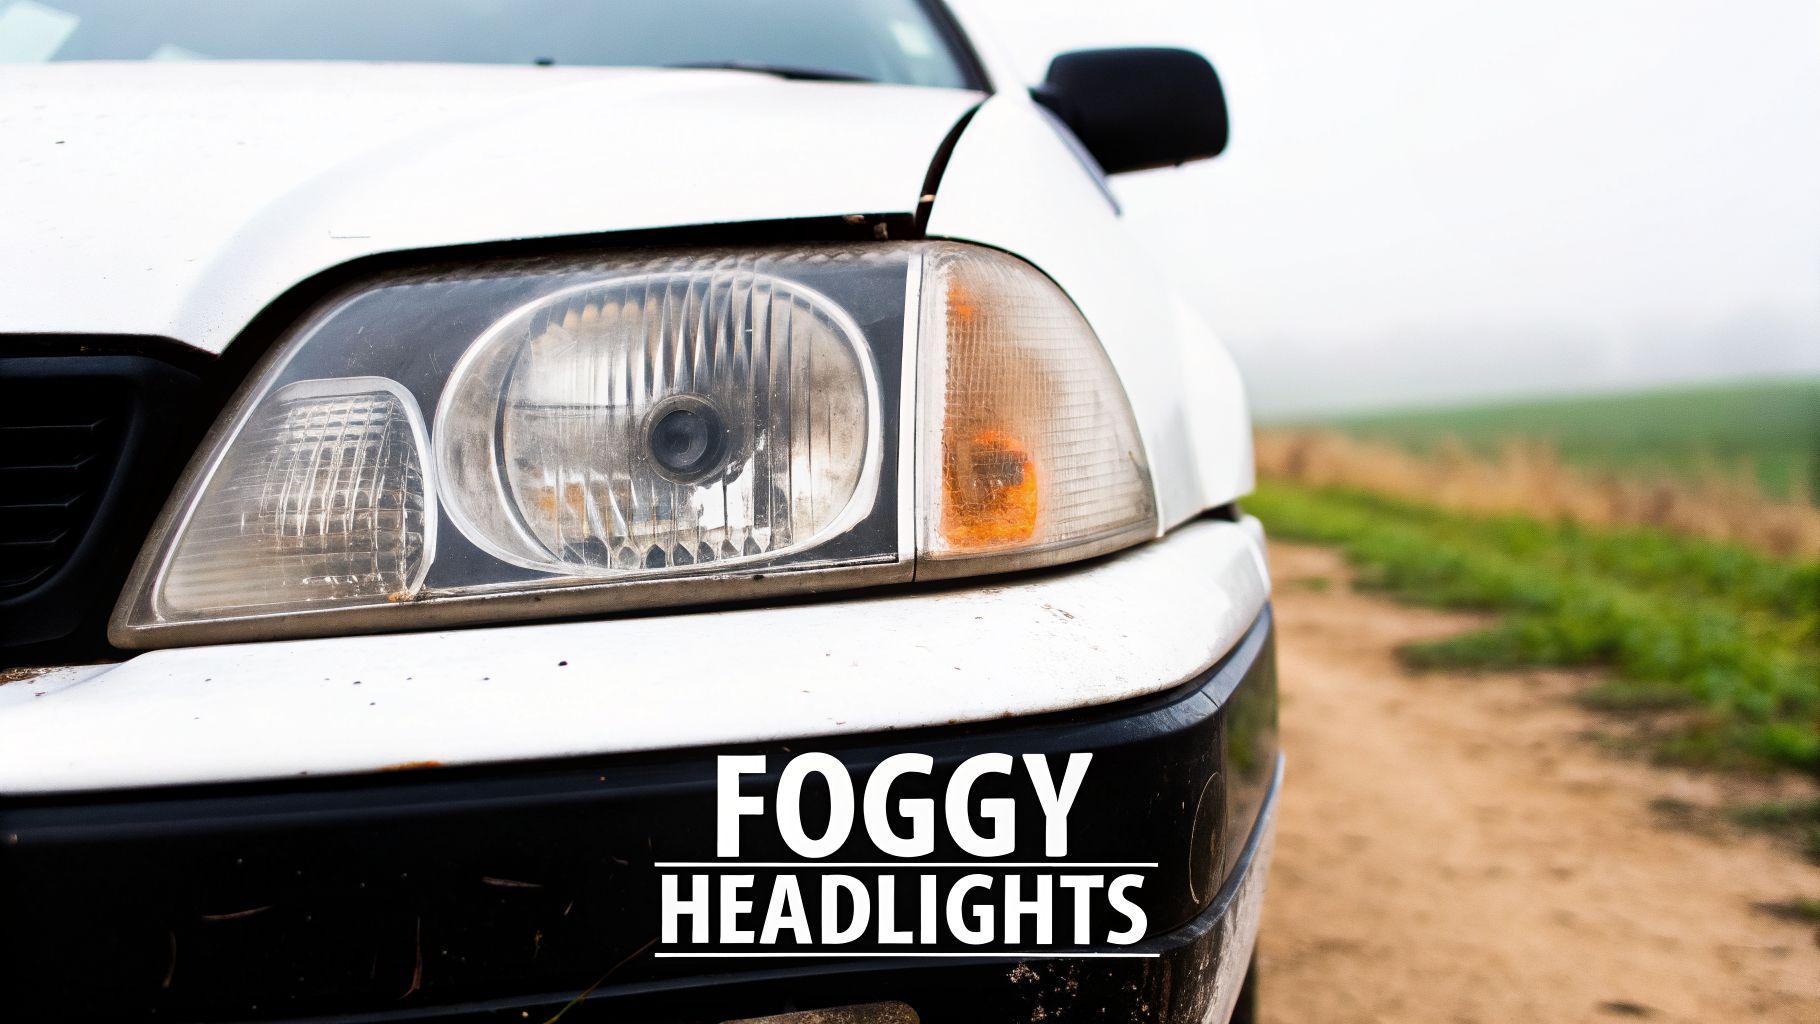
That hazy, yellow film clouding your car’s headlights isn’t just an eyesore—it’s a major safety hazard called oxidation. Most modern headlights are made from a tough plastic called polycarbonate. When they leave the factory, these lenses have a thin, clear coat that’s meant to shield them from the elements.
But over time, that protective layer just can't hold up. The biggest culprit is the sun’s relentless ultraviolet (UV) rays, which trigger a chemical reaction in the plastic. This breakdown gets a helping hand from road grime, acid rain, and even harsh car wash chemicals. The result is that foggy, yellowed surface that scatters light instead of projecting it cleanly down the road.
The Real Impact of Oxidized Headlights
Deteriorated headlights are not something you can afford to ignore. Did you know that oxidized lenses can slash your nighttime visibility by up to 80%? That’s a massive loss of light output, and it contributes to a shocking number of collisions. In fact, faded lenses are a factor in an estimated 25% of all nighttime accidents.
The good news? This is a completely solvable problem.
The science is clear: As the protective UV coating on your headlights degrades, the polycarbonate lens beneath is left vulnerable. Oxidation doesn't just look bad; it actively blocks light, shortening your beam distance and reducing your ability to see pedestrians, animals, or obstacles ahead.
Your Path to Clearer, Safer Headlights
When you're ready to tackle oxidation, you basically have two paths to choose from. You can either roll up your sleeves and do it yourself, or you can bring in a professional to handle it for you.
- DIY Restoration: This is a solid, cost-effective choice if you enjoy a hands-on project. Restoration kits come with all the sandpaper, polish, and sealant you need to get the job done right in your own driveway.
- Professional Service: Hiring an expert like GP Mobile Car Wash & Detail guarantees a flawless result. We use commercial-grade tools and can apply longer-lasting ceramic coatings that you can't get in a typical store-bought kit.
Understanding why headlight restoration matters is the first step toward making a confident decision. This guide will walk you through each method, giving you the practical knowledge you need to bring back your vehicle’s vision and curb appeal.
Do At-Home Headlight Cleaning Hacks Actually Work?
We’ve all seen the videos. Someone grabs a tube of toothpaste or a can of bug spray, gives their foggy headlights a quick scrub, and just like magic, the yellow haze is gone. It seems almost too good to be true—and honestly, it is.
These at-home cleaning hacks get so much attention because they use stuff you already have, promising a cheap, instant fix for a really annoying problem. But do they actually work where it counts? In the long run, the answer is a hard no.
The Short-Lived Shine of Kitchen Chemistry
Let's start with the most popular trick: toothpaste. On the surface, the logic makes some sense. Toothpaste has mild abrasives designed to polish tooth enamel, and when you rub it on a headlight, those abrasives will absolutely grind away the thinnest top layer of oxidation. For a moment, you get the illusion of a clear lens.
The same idea applies to a baking soda paste. It's slightly abrasive, so it can buff off some of that surface-level yellowing and grime, making the headlight look better for a little while. The bug spray hack is even more aggressive—its powerful solvents literally melt the oxidized plastic away.
The big problem here is that every single one of these methods only deals with the surface symptom. They scrape away the yellowed plastic but do nothing to protect the lens from happening all over again.
Think of it like sanding a piece of wood. You can get it perfectly smooth, but if you leave it out in the rain without any sealant, it’s going to warp and rot in no time. These home remedies do the exact same thing to your headlights, leaving them raw and exposed.
The Missing Piece of the Puzzle
Every headlight that leaves the factory has a crucial UV-resistant clear coat. This is the only barrier standing between the soft polycarbonate plastic of the lens and the sun's damaging rays. When you use an abrasive like toothpaste or a harsh solvent from bug spray, you're not just removing the yellow haze—you're stripping away the last little bit of that vital protective coating.
Once that protective layer is gone, the headlight lens is completely defenseless. The results are frustratingly predictable.
- Faster Re-Oxidation: That yellowing will come roaring back, often in just a few weeks or months.
- Worse Damage: Because the lens is now totally unprotected, the next round of oxidation is usually far more aggressive and harder to remove.
- Potential for Permanent Damage: Harsh chemicals, especially the ones found in bug spray, can permanently craze or fog the plastic itself. This can make a proper restoration down the line much more difficult, or even impossible.
So while these hacks might give you a fleeting moment of clarity—maybe just enough to squeak by a vehicle inspection—they aren't a real solution for how to remove oxidation from headlights. They're a temporary band-aid that actually makes the underlying problem worse, kicking the can down a very short road. For a fix that truly lasts, you need a process that includes reapplying a proper UV sealant.
Your Guide to Using a DIY Headlight Restoration Kit
If those quick home remedies are just a temporary band-aid, a good DIY headlight restoration kit is the real deal. This is the complete, lasting fix you can tackle right in your garage. These kits are a fantastic option if you enjoy a hands-on project and want to get results that are almost professional-grade, but without that professional price tag.
Unlike a simple toothpaste scrub, a quality kit comes with everything you need for a multi-step process. It doesn't just clean the surface—it removes the damaged plastic and, most importantly, adds a layer of protection for the future. You’ll get sanding discs, polishing compounds, and the non-negotiable UV protective sealant. That last part is what really makes a kit a true solution for how to remove oxidation from headlights.
DIY Restoration Kit Materials Checklist
Before you start sanding away, it’s smart to lay out all your tools. There’s nothing worse than getting halfway through a job and realizing you're missing something. This checklist covers everything you'll typically find in a kit, plus a few extras that make the job go smoother.
| Item | Purpose | Pro Tip |
|---|---|---|
| Automotive Painter's Tape | Protects the paint and trim around the headlight from accidental scuffs. | Use a wide, high-quality tape. It's worth spending a little extra to avoid a big paint-correction headache later. |
| Assorted Sanding Discs | Removes layers of oxidation, starting coarse and finishing fine. | Keep them organized by grit number. Mixing them up can ruin your finish. |
| Sanding Block or Pad | Ensures even pressure while sanding, preventing divots or low spots. | If your kit doesn't include one, a firm sponge can work in a pinch. |
| Polishing Compound | Removes the fine sanding marks and restores optical clarity. | A little goes a long way. Don't slop it on; apply a small amount and work it in. |
| Polishing Pad/Applicator | Used to apply and work the polishing compound into the lens. | Can be attached to a drill for faster results, but go slow to avoid burning the plastic. |
| UV Protective Sealant | Creates a durable barrier against sun damage, preventing future oxidation. | This is the most crucial step for longevity. Do not skip it. |
| Microfiber Towels | For cleaning, drying, and buffing throughout the process. | Have at least 3-4 clean, dry towels on hand before you start. |
| Spray Bottle with Water | Used for the wet sanding process to lubricate the surface. | Add a drop of car soap to the water to help lift away the plastic slurry. |
Having all your materials ready means you can focus on the process without interruption, which is key to getting that crystal-clear, factory-fresh look.
Prepping Your Vehicle For Restoration
Before you even think about opening the first sanding disc, preparation is what separates a great result from a sloppy one. Your main goal here is to completely isolate the headlight so you don't accidentally scratch or mar the surrounding paint, chrome, or plastic trim.
Grab a roll of quality automotive painter's tape. Carefully mask off the entire border of the headlight, creating a clean, crisp perimeter. I always recommend taking an extra minute to apply two layers of tape or using a wide roll—it gives you a much bigger margin for error. This simple step prevents a huge headache later. After taping, give the headlight lens one last, thorough cleaning with soap and water to get rid of any loose dirt.
The Multi-Stage Sanding and Polishing Process
This is where the magic happens. Most kits are designed for wet sanding, which just means you'll use water to keep both the sandpaper and the lens lubricated. This is a critical technique—it stops the sandpaper from clogging up and helps float away the oxidized plastic particles, which will come off as a milky, yellowish slurry.
You’ll start with the most aggressive sandpaper in the kit (usually around 800 or 1000-grit) and methodically work your way to the finest grits (like 2000 or 3000-grit).
- Coarse Sanding: This first step does the heavy lifting. The coarse grit strips away that thick, yellowed layer of failed clear coat and oxidized plastic.
- Fine Sanding: As you switch to finer grits, you're no longer removing heavy oxidation. Instead, you're smoothing out the scratches left by the previous, coarser grit, prepping the lens for a perfect polish.
Consistency is everything when you're sanding. Apply firm, even pressure and stick to a uniform direction for each grit (for example, sand horizontally with the 800-grit, then vertically with the 1500-grit). This systematic approach ensures you cover every inch and end up with a flawlessly smooth surface.
Once you finish with the finest sandpaper, the lens will look hazy or frosted. Don't panic, this is exactly what you want to see! That frosted finish means you've created a uniform surface, and the polish is next. Using the compound and applicator pad from your kit, you’ll buff the lens until that haze disappears and transforms into a brilliant, crystal-clear shine. The polish essentially erases those microscopic sanding marks, restoring the lens's optical clarity.
Applying the UV Sealant Correctly
You’ve done all the hard work, and your headlights look like new again. Now comes the single most important step for making it last: applying the UV sealant. This clear coating is the only thing that stands between your beautifully restored lens and the sun's rays that caused the problem in the first place.
The infographic below shows why so many home "hacks" fail—they completely skip this protective step.
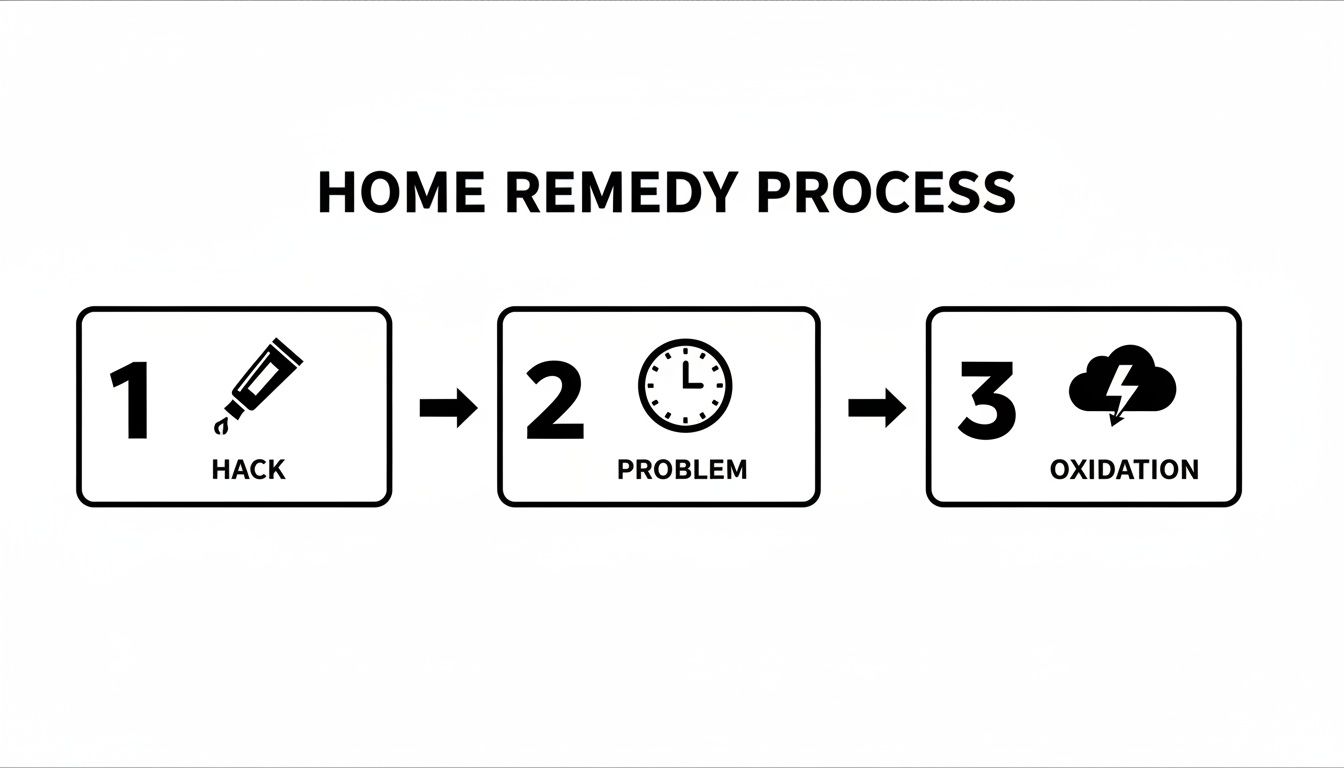
As you can see, without a sealant, that fresh clarity is short-lived, and the oxidation quickly comes back.
Make sure the headlight is perfectly clean and bone-dry before you open the sealant. Any leftover moisture or dust will stop it from bonding properly. Apply the sealant in a single, confident motion, getting even coverage across the entire lens. Do not touch, wipe, or try to "fix" the area after you've applied it. Let it cure for the time your kit recommends—usually at least an hour, but leaving it to cure overnight in a garage is even better. This allows the coating to fully harden into a tough, long-lasting shield.
When to Call a Professional for Headlight Restoration
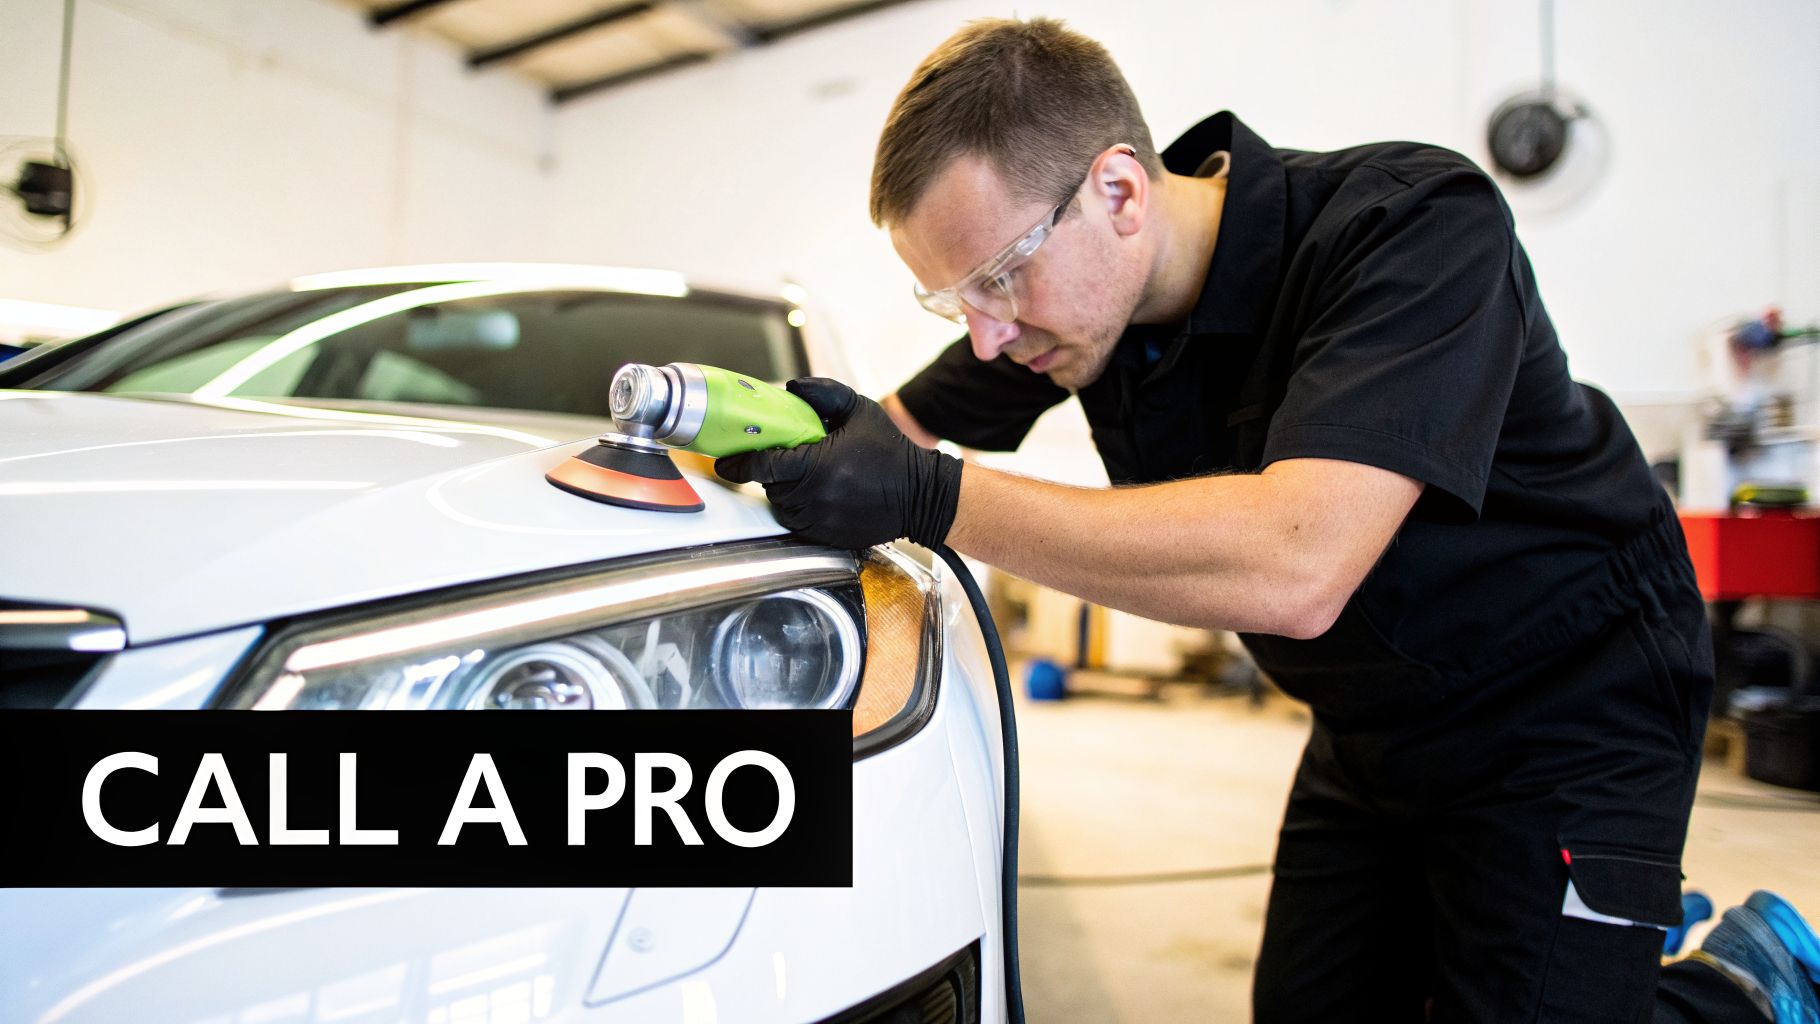
Look, a good DIY kit can get you some decent results, and we're all for tackling a project yourself. But there are times when handing the keys to a pro is the smarter, safer, and more effective move. This isn't just about saving time—it's about getting a result you simply can't match in your driveway.
Hiring an expert is the right call when you're short on time, don't feel confident with multi-stage sanding, or if your vehicle has valuable or complex headlights, like the ones on modern luxury cars.
Superior Tools and Techniques
Professional detailers come equipped with tools that go way beyond what you find in a consumer kit. We use powerful orbital sanders and polishers that guarantee a perfectly even surface correction, something that’s nearly impossible to do right by hand. This machinery strips away oxidation much more efficiently and preps the lens for a flawless finish.
More importantly, a professional service like GP Mobile Car Wash & Detail uses commercial-grade ceramic coatings and sealants. These are far more durable than the tiny wipes in store-bought kits, offering years of solid protection against UV rays and road grime.
A professional restoration isn’t just a deep clean; it's a complete surface refinishing. An expert can judge the depth of the damage and knows exactly how much material to remove without weakening the lens—a costly mistake for any DIYer.
The Long-Term Value of a Professional Job
Going with a pro is an investment in both safety and longevity. Research has shown that heavily oxidized lenses can cut light output by a staggering 50-70% in just five years, creating a real safety hazard at night.
A professional job, which often starts with clay bar decontamination and precise machine polishing, can restore your headlights to near-factory brightness. This can improve your total detection distance by up to 150 feet. Plus, the commercial-grade UV coatings we apply can block up to 98% of degrading rays. That’s a huge advantage over DIY kits, where over 60% of users report the yellowing comes back in under six months because the sealant just wasn't strong enough.
When to Make the Call
Knowing when to skip the DIY aisle and call a professional comes down to a few key issues. If your headlights show any of these signs, we strongly recommend getting expert help:
- Deep Pitting or Scratches: If you can feel deep grooves or pits with your fingernail, hand-sanding simply won't be enough to fix it.
- Moisture Inside the Lens: Seeing fog or condensation on the inside of the lens means you have a broken seal. This requires removing and resealing the entire headlight assembly, which is far beyond what a restoration kit can do.
- Luxury or Advanced Headlights: Cars with adaptive or self-leveling headlights have complex, expensive assemblies. The risk of damaging them far outweighs the money you might save with a DIY attempt.
Ultimately, a professional saves you from the frustration and costly mistakes of a project gone wrong. You get guaranteed, long-lasting results that protect your investment and make your vehicle safer. For a better idea of what's included in a complete professional service, you can check out our guide on what auto detailing services cover.
Comparing Your Options DIY vs Professional Service
So, you've decided to tackle that headlight oxidation. Now comes the big question: should you roll up your sleeves and do it yourself, or call in a professional? Both approaches can get you clearer, safer headlights, but the path you take—and the final result—can look very different. The right choice really depends on your budget, how much time you have, and the kind of quality you’re after.
A DIY headlight restoration kit is a tempting option, especially for the hands-on car owner. For a small investment of around $20-$40, you get a box with everything you need to spend a weekend afternoon bringing your lights back to life. These kits usually come with sandpaper, some polish, and that all-important UV sealant.
The catch? Your results are completely dependent on your own patience and skill. It's easy to sand unevenly, which can leave streaks that are just as distracting as the original haze. The biggest issue we see is with the sealants. Consumer-grade products often look great for a few months, but they just don't have the staying power. Most DIY jobs start re-oxidizing in under a year.
The Professional Advantage
Choosing a professional service like GP Mobile Car Wash & Detail is about more than just convenience. It's an investment in a flawless, long-lasting finish. While the cost is higher, typically $75 to $150, you're paying for experience, specialized tools, and commercial-grade materials you simply can't buy at an auto parts store.
We use tools like orbital sanders to guarantee a perfectly smooth and even surface, followed by powerful polishers that pull every last bit of clarity out of the polycarbonate. The real game-changer, though, is the protection. We apply high-end sealants or even ceramic coatings that create a tough, durable chemical bond with the lens.
Think of it this way: a DIY kit is like painting a room yourself. With enough care, you can get a decent result. A professional service is like hiring a master painter who guarantees perfect lines, a flawless finish, and uses premium paint designed to last for years.
This professional-grade protection is why our service often comes with a guarantee. While a DIY fix might get you through a year, a professional restoration can protect your headlights for 3-5 years or more, making it a much better value over time. If you're curious about that level of durability, you might want to learn more about how a professional ceramic coating can provide similar long-term protection for your entire vehicle.
Headlight Restoration Showdown DIY Kit vs Professional Detail
To make the choice a little easier, let's put the two options side-by-side. This table breaks down the key differences to help you decide which path is right for you and your vehicle.
| Factor | DIY Restoration Kit | Professional Service |
|---|---|---|
| Total Cost | Low ($20 – $40) | Moderate ($75 – $150) |
| Time Investment | 2-3 hours of your time | 60-90 minutes done for you |
| Skill Required | Moderate; requires patience and attention to detail. | None; handled by trained experts. |
| Longevity of Results | 6-18 months, depending on sealant quality. | 3-5+ years with professional-grade coatings. |
| Risk of Error | Moderate; risk of uneven sanding or poor sealant application. | Low; guaranteed results and no risk of damaging your car. |
Ultimately, whether you choose a DIY kit or a professional service, you're taking a positive step toward safer driving and a better-looking car. The key is to be realistic about the time, effort, and longevity you expect from your investment.
Common Questions About Headlight Restoration
Once your headlights are crystal clear again, you'll naturally want to keep them that way. We get a lot of questions from car owners about what comes next, so let's clear up some of the most common concerns we hear.
Think of this as your quick guide to making sure that fresh, like-new look lasts as long as possible.
How Can I Keep My Headlights from Getting Foggy Again?
The secret to long-lasting clarity is all about protection. The most important thing you can do is apply a high-quality UV sealant or ceramic coating right after the restoration is finished. Without that protective layer, the bare plastic is exposed to the sun, and the fogginess can come back in just a few months.
Here are a few simple habits to extend the life of your restored headlights:
- Wash Your Car Often: Don't let road grime, salt, and chemicals sit on your headlights. Regular washing removes these contaminants before they have a chance to break down the sealant.
- Park in the Shade: Whenever you have the choice, park in a garage or under cover. Minimizing direct sun exposure is the single best way to fight back against UV damage.
- Give Them a Boost: Every few months, when you're washing your car, take an extra minute to apply a spray wax or sealant to the headlights. This adds another layer of defense and really helps maintain that clarity.
Is It Safe to Use Bug Spray on Headlights?
We see this "hack" all over the internet, and our strong advice is to stay away from it. While the aggressive solvents in bug spray (like DEET) will dissolve the top layer of oxidation and make the headlight look clear for a moment, it’s a trap.
Those same chemicals also eat away any factory UV coating left on the lens and can permanently damage the plastic itself.
Using bug spray on a headlight is like trying to clean a scuff on your wall with paint thinner. Sure, the scuff might disappear, but you’ll also strip the paint right off, leaving you with a much bigger problem than you started with. The oxidation will always return, and it’s usually much worse the second time around.
What's the Difference Between Oxidation and Internal Moisture?
It's really important to know which problem you're dealing with, because they are completely different issues with different solutions.
Oxidation is the yellow, cloudy, or hazy film that builds up on the outside of the headlight lens. This is the problem that all the restoration methods in this guide are designed to fix.
If you see condensation or water droplets on the inside of the lens, that means the headlight assembly’s waterproof seal has failed. A standard restoration won't fix this. The problem requires taking the entire headlight housing off the vehicle, drying it out, and carefully resealing it to keep moisture from getting back in.
How Long Does a Professional Headlight Restoration Take?
Most people are surprised by how quickly a professional can get the job done. For a standard pair of headlights, the entire process usually takes between 60 and 90 minutes.
That includes taping off the paint, a multi-stage sanding process, machine polishing for a perfect finish, and applying a durable ceramic sealant. It’s a fast and affordable service that makes a huge difference in your car's safety and appearance.
Don't let foggy headlights put your safety at risk or ruin your car's look. If you're ready for a professional solution that's guaranteed to last, the team at GP Mobile Car Wash & Detail is here to help. Schedule your professional headlight restoration today and get back to driving with confidence.