You notice leather seats gradually, not all at once. One week they still feel rich and smooth. A few months later the driver’s bolster looks dull, the stitching is holding grime, and the seat that used to feel soft now feels a little dry every time you slide in.
That’s how most leather damage starts. Not with one big mistake, but with daily friction, sunlight, body oils, dust, and the wrong cleaner used in a hurry.
Knowing how to care for leather car seats isn’t about making the interior shiny. It’s about preserving a natural surface that reacts to heat, moisture, abrasion, and neglect. Done right, leather care protects comfort, keeps the cabin looking sharp, and helps the vehicle hold its value. Done wrong, it can leave you with slick seats, clogged perforations, faded panels, or permanent dye damage.
The good news is that proper care isn’t complicated. It just has to be done with the right order, the right products, and some restraint.
The Enduring Appeal and Hidden Risks of Leather Seats
A leather interior can still look excellent at 80,000 miles, or look tired before the loan is halfway paid off. I see both outcomes in Nebraska. The difference is usually not the badge on the hood. It is heat, winter dryness, body oil, abrasion, and whether the owner cleaned the seats with a product meant for leather instead of whatever was under the sink.
Leather earns its reputation. It gives the cabin a cleaner, more finished look than cloth, and routine maintenance is usually easier. It also shows neglect faster. Once the driver’s seat picks up glossy wear spots, dark grime along the seams, or light cracking on the bolster, the whole interior feels older.
What everyday use really does
Daily wear comes from several sources at the same time:
- Sliding across the bolster: The outside edge of the driver’s seat takes constant friction from jeans, jackets, belts, and getting in and out.
- Skin oils and sweat: These sit on the finish, attract dirt, and leave darker areas on high-contact panels.
- Dust and fine grit: Grit settles into stitching, creases, and perforations, then keeps rubbing every time someone sits down.
- Sun and heat: Nebraska summer sun can dry the surface fast, especially on lighter interiors and vehicles parked outside.
- Cold-weather dryness: Winter cabin heat lowers humidity and can leave leather feeling stiff if it is never conditioned.
- Spills cleaned the wrong way: Harsh cleaners, heavy scrubbing, and soaking the seat often create more damage than the spill.
The risk is not always obvious at first. Protected automotive leather has a finished surface, so owners often assume it can handle any interior cleaner. It cannot. Strong degreasers, disinfecting wipes, and glossy dressings can strip the finish, leave residue, or make the seat slick. On perforated leather, too much liquid adds another problem. Moisture and product residue can settle into the holes and padding below.
Practical rule: If the driver’s seat feels dry, looks shiny in random patches, or has dark buildup near stitching, the leather is already asking for attention.
Preservation costs less than repair
Basic upkeep is cheap. Repair is not.
Once dye transfer has set into a light-colored seat, once the topcoat starts wearing thin on the bolster, or once perforations are packed with grime, the margin for error gets smaller. A careful DIY cleaning can still help, but some problems move into repair territory fast. That is where owners waste money trying one more household product and make the seat harder to correct later.
A better approach is simple and surface-safe. Remove loose grit first. Clean with a pH-appropriate leather cleaner or a mild non-toxic product made for coated automotive leather. Use minimal moisture, especially on perforated panels. Let the seat dry completely, then apply a light conditioner or protectant that does not leave shine or residue.
That routine is relevant because older advice still floats around. Saddlesoap, heavy oils, and shiny vinyl dressings are poor choices for most modern car leather. In this climate, steady maintenance beats aggressive treatment every time.
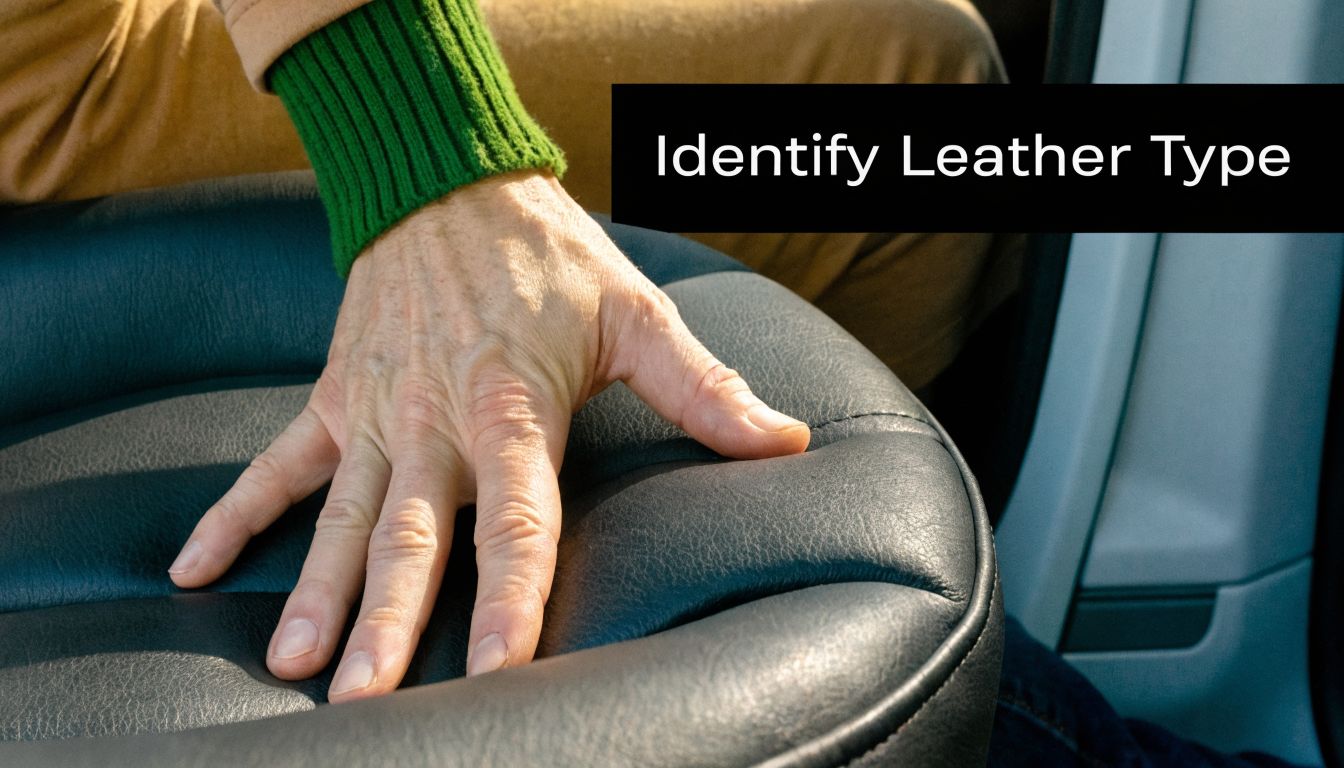
Decoding Your Car's Leather Before You Clean
Most leather care mistakes happen before the cleaning even starts. People assume all car seats are the same, then use one product and one technique on everything from coated black leather to delicate tan inserts to leatherette.
That’s how seats get blotchy, tacky, or prematurely worn. Reviven Drive Detailing’s methodology says 30% of DIY failures stem from misidentifying leather types.
The three surfaces most owners deal with
Protected or pigmented leather is the most common in modern vehicles. It has a finished top layer that makes it more resistant to staining and easier to clean. Most late-model daily drivers use some version of this.
Aniline or semi-aniline leather is less common and usually found in higher-end interiors. It feels softer and more natural, but it’s also more porous and less forgiving. Strong cleaners or too much moisture can create uneven darkening.
Leatherette or faux leather isn’t leather at all, even if it looks close at first glance. It needs a different mindset. You’re cleaning a synthetic surface, not restoring natural oils.
A safe way to tell what you have
You don’t need to run lab tests. Start with observation.
- Look at the finish: If the surface is very uniform in color and texture, it’s often protected leather or leatherette.
- Feel the surface: Protected leather has a coated, slightly firmer feel. Aniline feels warmer and more open.
- Check the owner’s materials: Some brands identify seating surfaces clearly.
- Use a cautious water-drop test: Place a tiny drop of water on a hidden area. If it beads and stays on top, the material is likely coated. If it darkens quickly or absorbs, treat it as a more delicate surface.
That last step needs restraint. Use very little water, choose an inconspicuous area, and don’t repeat it all over the seat.
The right cleaner on the wrong material still becomes the wrong cleaner.
Why modern leather behaves differently
Automotive leather today isn’t the same as what people remember from older luxury cars. Gtechniq’s leather protection guidance notes that advancements since the 1980s have reduced maintenance needs by 60%, and that modern automotive leathers often incorporate 15% to 20% synthetic polymers for durability. The same source notes that by 2000, nano-protectants extended protection intervals from monthly to every 4 to 6 months and helped prevent 85% of denim dye transfer on light leathers.
That matters because older advice still floats around. Saddle soap, household detergents, heavy oils, and glossy dressings all come from a time when people treated vehicle leather more like furniture or boots. Modern seat leather usually responds better to a pH-balanced, water-based, surface-safe system.
What this means before you start
If you’re working on a normal late-model daily driver, the safest path is usually a pH-balanced cleaner, soft brush, microfiber towels, and a light conditioner. If the seat is unusually soft, lightly dyed, or expensive enough that a mistake will bother you every time you open the door, caution is smart.
Misidentifying the surface is one of the few mistakes that can turn a basic cleaning into a repair job.
The Professional Method for Deep Cleaning Leather Seats
A leather seat usually looks worst where people rush. The lower bolster is dark from body oils, crumbs are packed into the stitching, and the perforations are holding old dust and cleaner residue from the last DIY attempt. Good deep cleaning fixes that, but only if the seat stays controlled from start to finish.
The process we use in the field is simple. Remove dry debris first, clean in small sections, and wipe residue before it flashes off. Abrasion is what ruins a lot of leather interiors. If grit is still sitting on the surface while you scrub, that grit becomes your abrasive.
Start dry, not wet
Begin with a careful vacuum using a soft brush attachment. Spend extra time on seams, piping, around seat controls, and where the backrest meets the bottom cushion. Those tight areas hold the sand, lint, and food dust that a towel will never pull out cleanly.

On perforated leather, slow down even more. Use light suction and keep the brush moving. Flooding those holes with cleaner is one of the fastest ways to create a bigger problem, especially if moisture gets into the foam beneath the seat cover and dries slowly in Nebraska humidity.
Use the vacuum to open up the surface before any liquid touches it.
The safest cleaning workflow
For most late-model leather interiors, this is the method that gives the best balance of cleaning power and low risk:
- Vacuum thoroughly: Clean seat bottoms, bolsters, seams, stitching, perforations, and seat tracks.
- Test first: Check a hidden spot for any change in color, darkening, or gloss level.
- Apply cleaner to the tool: Mist a soft leather brush or microfiber towel. Keep direct spray off the seat whenever possible.
- Work one small area at a time: About a hand-sized section is easier to control than trying to clean the whole seat at once.
- Agitate lightly: Use short, overlapping passes. Let the cleaner do the work.
- Wipe immediately: Remove loosened soil with a clean microfiber before residue dries back onto the surface.
- Repeat if needed: A second light pass is safer than one aggressive pass.
That approach is important for those who want clean seats without harsh chemical residue and without pushing moisture into seams or perforations.
Here’s a visual walkthrough of the sequence.
Tools that help and tools that hurt
The right tools make leather cleaning predictable:
- Soft leather brush or horsehair brush: Enough bite to lift grime, not enough to scuff the finish
- Several clean microfiber towels: One for initial wipe-down, one for final leveling, one in reserve
- Water-based, pH-balanced leather cleaner: Safer for modern coated leather and easier to control
- Soft vacuum attachment: Especially useful for seams and perforated panels
The tools that create repair bills are usually the same ones. Stiff brushes, magic erasers, household degreasers, and aggressive steam all increase the chance of dull spots, lifted dye, or hardened leather edges. Steam has its place in detailing, but leather is not the surface to experiment on if you do not already know how much heat and distance to use.
Clean leather should feel natural. Matte to low-satin is the target. If it feels slick, sticky, or glossy, product is still sitting on the surface.
What to do with stains
Stains need judgment. Body oil on a driver bolster is different from sunscreen, coffee, ink, or blue-jean transfer on a light seat. Start with the mildest effective option and give it more than one pass before you reach for something stronger.
For more specific spill and spot-cleaning situations, use this guide on how to remove stains from car interior surfaces before trying harsher products that can mark the finish.
If a stain has already migrated into the coating, or if the leather has gone tacky, shiny, or discolored from old cleaners, that is usually the point where DIY stops making financial sense.
What works in Nebraska conditions
Nebraska weather changes how leather should be cleaned. In summer, heat and humidity can leave an over-wet seat damp longer than people expect. In winter, cold air and indoor heat can make leather feel dry, which leads some owners to overuse product after cleaning.
The better approach is restraint. Use a non-toxic, water-based cleaner sparingly. Keep sections small. Wipe thoroughly. Let airflow handle drying instead of adding more product.
For a well-kept daily driver, this job is very manageable at home. For heavy buildup in seams, dye transfer on light leather, perforated seats that have been oversaturated before, or interiors where you are not fully sure what material you are dealing with, a professional service is the safer call. GP Mobile Car Wash & Detail includes leather cleaning in its Deluxe package for owners who want the seats handled as part of a full interior detail.
Conditioning Your Leather for Suppleness and Protection
Cleaning removes contamination. It doesn’t finish the job. Once the leather is clean and fully dry, conditioning helps restore a softer feel and adds a layer of protection against future drying and wear.
A lot of people go wrong here because they think more product means more protection. It usually means greasy residue, clogged stitching, and a seat that attracts dust.
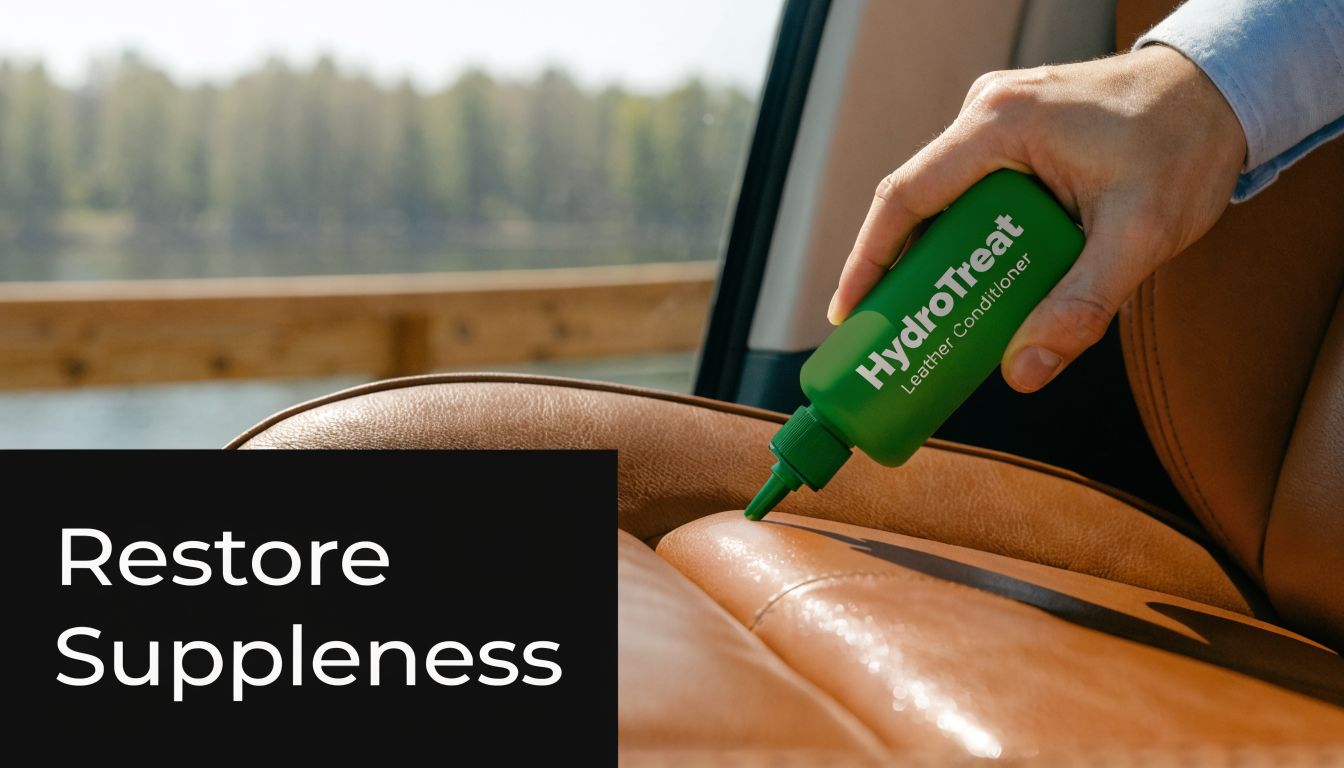
Use less than you think
Chemical Guys’ leather care guidance recommends applying a dime-sized amount of water-based conditioner with a foam applicator, allowing a 5 to 15 minute dwell time for 80% pore penetration. The same guidance says this reduces cracking incidence by 60%, and warns that oily residue can attract dust and double the rate of wear if excess isn’t buffed off.
That’s the part many DIY jobs miss. Conditioner isn’t supposed to sit on top like a shiny dressing.
The application method that gives a satin finish
Use this order:
- Let the seat dry first: After cleaning, give the leather proper air-dry time.
- Apply to the applicator, not the seat: A foam pad or microfiber applicator gives better control.
- Work small areas: Circular, overlapping motions help spread product evenly.
- Watch the stitching: Don’t flood seams or perforations.
- Buff off excess: A clean microfiber towel should leave the seat looking natural, not glossy.
If the surface looks shiny or feels slippery after conditioning, there’s too much product on it.
Why UV protection matters in a Nebraska car
Sun exposure is one of the biggest reasons leather dries out unevenly, especially on upper bolsters, seatbacks, and any cabin that spends time parked outside. Products with UV inhibitors make sense here, especially for vehicles that commute daily or sit in open lots.
You don’t need a thick, oily conditioner to get that benefit. In fact, lighter water-based formulas tend to be easier to apply evenly and easier to buff to a factory-looking finish.
Shop standard: The best-conditioned seat doesn’t announce itself. It feels flexible, looks even, and doesn’t leave residue on clothing.
Choosing products carefully
The safest route is a water-based, non-toxic conditioner designed for automotive leather. That avoids the strong fragrance, greasy finish, and surface buildup that some older products leave behind.
If you’re comparing options, this roundup of interior detailing products worth using on vehicle surfaces can help you sort through what belongs in a car and what doesn’t.
The right end result is simple. The leather should feel calmer than it did before. Softer, more even, easier to maintain next time. Not drenched, not glossy, not coated in residue.
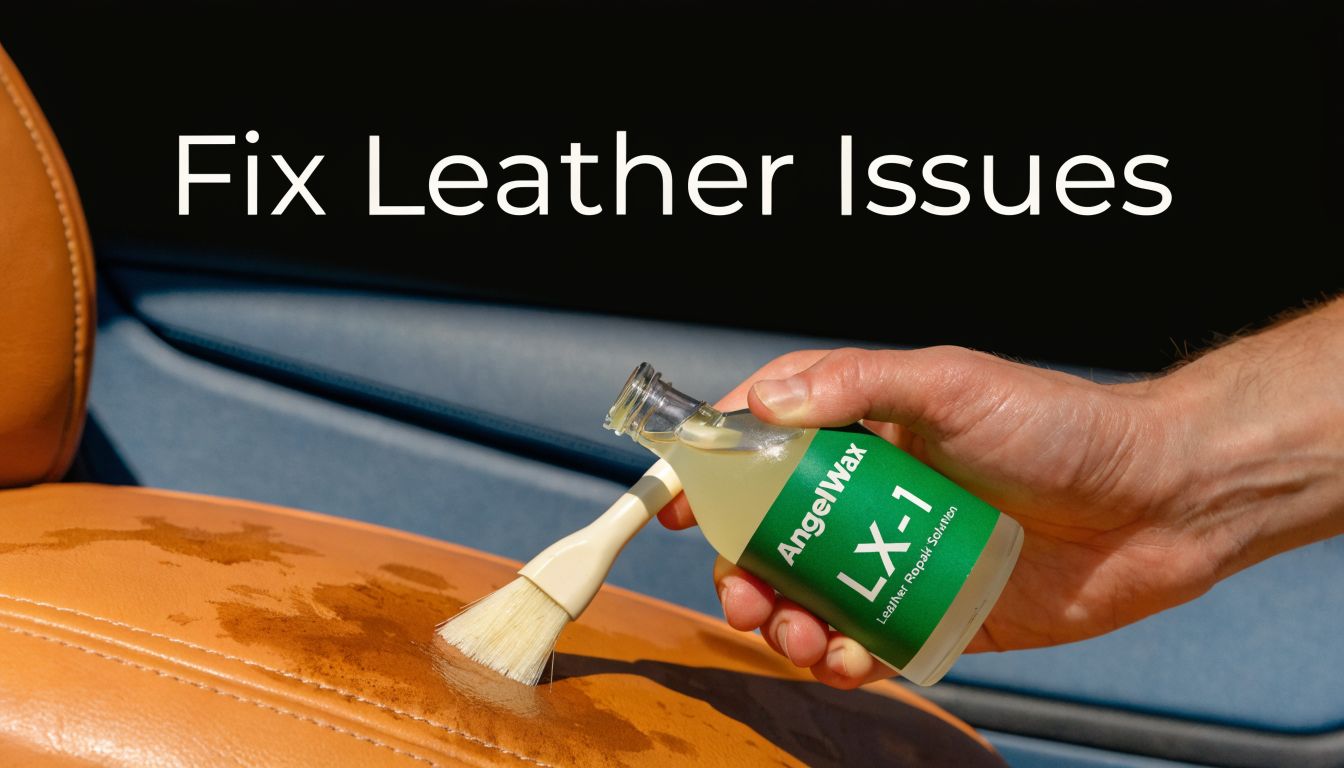
Solving Common Leather Problems and Special Cases
Routine maintenance is one thing. Spot problems are where people tend to panic and overcorrect.
A dark transfer mark from blue jeans, a scuff on the outer bolster, or moisture around perforated seats can push someone toward stronger chemicals and harder scrubbing. That usually makes the problem larger.
Dye transfer and stubborn marks
Light-colored leather often shows clothing transfer first. The temptation is to grab a harsh cleaner and chase the stain aggressively. Instead, start with repeated gentle passes using a pH-balanced cleaner on a microfiber towel or soft brush.
If the mark lightens but doesn’t disappear, stop before you damage the top finish. A partially visible stain is easier to live with than a polished-through patch.
For ink, heavy transfer, or mystery spots that have been sitting for a while, the primary question isn’t “Can I scrub this out?” It’s “How much finish am I willing to risk?” That’s usually where a professional assessment makes sense.
Scuffs and shiny wear areas
Scuffs and wear aren’t the same thing. A scuff may just be material sitting on top of the finish. Wear means the finish itself is changing.
Try the least aggressive approach first:
- Light surface scuff: Clean gently and reassess once dry.
- Shiny patch from buildup: Clean in controlled passes. Don’t condition until you know the residue is gone.
- Color loss or roughness: Cleaning won’t restore missing finish. That becomes repair work, not maintenance.
- Frayed seam edges or cracking: Stop DIY treatment and prevent further abrasion until it can be evaluated.
Perforated leather needs a different method
Perforated leather is where a lot of generic advice falls apart. Those holes look small, but they change the whole cleaning process because liquid can travel below the surface into the padding.
Zimbrick’s guidance on leather and leatherette care notes that perforated leather is found in 70% of 2025+ luxury models, that care for it is underserved in 90% of guides, and that perforated seats can show 40% higher moisture retention in humid climates. Their recommended method is to mist cleaner onto a cloth, blot the surface, and avoid heavy conditioners.
That advice matters in Nebraska, where humidity swings through the year can make trapped moisture a real issue.
Safe protocol for perforated seats
If your seats are perforated, keep it simple:
- Vacuum first with a soft brush attachment. Pull debris out of the holes before adding any moisture.
- Mist product onto the cloth, never directly onto the seat.
- Blot rather than scrub. Rubbing can push moisture and dirt deeper into the perforations.
- Use very light product amounts. More liquid does not equal a deeper clean.
- Skip heavy cream conditioners. Breathability matters, especially on ventilated seats.
- Let the seat air-dry thoroughly. Don’t trap moisture by closing the car up right away.
Perforated leather rewards restraint. If the holes are wet, the seat is already too wet.
Some technicians use compressed air carefully after cleaning to clear residue from the perforations. That can help, but it also needs a controlled hand. Too much pressure can spread moisture or drive debris sideways into seams.
When odor points to a deeper issue
Leather itself isn’t always the source of a bad smell. Moisture under the seat, food in the tracks, and buildup in carpet edges can all get blamed on the leather because that’s where you sit.
If the interior smells musty after cleaning, look beyond the seat surface. This guide on getting rid of bad smell in a car is a helpful next step for tracking down the actual source instead of covering it up.
Your Sustainable Leather Care Maintenance Schedule
A Nebraska winter can dry a seat out fast. Then summer heat bakes the same surface, especially on the driver’s side where body oils, friction, and sun all hit the same spots. Leather holds up well when the routine matches that cycle.
The goal is steady upkeep with low-toxicity, surface-safe products. A mild cleaner, a water-based conditioner that leaves a dry finish, and clean microfiber towels will cover almost every maintenance job an owner should handle at home. You do not need a shelf full of dressings, gloss products, or heavy creams.
Leather Seat Maintenance Calendar
| Frequency | Task | Goal |
|---|---|---|
| Weekly | Dry microfiber wipe of seating surfaces and a quick check for spills, dust, grit, or fresh dye transfer | Keep light contamination from turning into embedded grime |
| Monthly | Gentle cleaning of the driver’s seat, bolsters, seat base, armrest contact points, and exposed seams | Remove body oil and dirt before the finish starts to look shiny or feel tacky |
| Every 2 to 3 months | Full clean and light conditioning of leather seating surfaces | Maintain flexibility and reduce drying from heat, cold, and daily use |
| Seasonally | Adjust care for Nebraska weather. Check for dryness in winter and UV stress in warmer months | Match product use and inspection to the climate instead of following a rigid routine |
| As needed | Clean up spills right away and inspect after road trips, pets, kids, or heavy use | Limit stain setting, abrasion, and avoidable wear |
A schedule only works if it is realistic. For most daily drivers, weekly attention means a two-minute wipe and a quick look at the seat base and bolster. Monthly care is where you remove buildup. The every-2-to-3-month interval is the right time for a fuller reset, assuming the seats are in normal condition and not dealing with stains, odor, or neglected wear.
Habits that prevent wear
A few habits save more leather than any conditioner:
- Use a sunshade when parked outside. It cuts heat load on the seat tops and headrests.
- Empty hard items from back pockets. Wallet corners, keys, and metal clips wear bolsters faster than people realize.
- Vacuum before any damp cleaning. Grit on the surface acts like an abrasive.
- Blot spills early. Fresh contamination is easier to remove with less product and less rubbing.
- Keep your kit simple. One safe cleaner, one light conditioner, and several dedicated microfiber towels are enough.
If you have perforated seats, keep maintenance lighter than you would on solid panels. Use less liquid, work with towels instead of spraying surfaces, and skip any product that leaves residue in the holes. That is one area where restraint protects the seat.
Do less, but do it on time
Over-maintenance causes its own problems. Frequent heavy conditioning can leave the surface slick, attract dust, and soften the finish more than you want. Constant product switching is another common mistake. If a non-toxic cleaner and a proven conditioner are working, stay with them.
I tell clients to watch the seat, not the label. If the leather feels clean, looks even, and is not drying out, leave it alone until the next service interval. Good maintenance keeps the material stable and the interior looking cared for without turning a simple job into a chemistry experiment.
When to Call the Pros at GP Mobile Car Wash & Detail
DIY leather care makes sense for regular upkeep. If the seats just need vacuuming, a careful cleaning, and light conditioning, most owners can handle that with patience and the right products.
The trouble starts when the job moves beyond maintenance. That’s when people spend more money, more time, and get worse results because they’re trying to solve a repair problem with a cleaning process.
DIY is reasonable when
You’re usually fine doing it yourself if the situation looks like this:
- Light grime and body oil buildup
- Routine maintenance on coated leather
- A recent spill that hasn’t set
- You know what material you’re working on
- You have time to work slowly and let the seats dry properly
Call a professional when
Professional help is the smarter move when any of these show up:
- You’re not sure what type of leather or leatherette you have
- The seat has perforations and you’re worried about moisture getting below the surface
- There’s dye transfer, ink, or heavy staining
- The leather is already dry, rough, cracked, or losing color
- You want the whole interior corrected properly, not just wiped down
- You don’t have time to do the job carefully
A rushed leather job usually looks clean for a day and disappointing for much longer.
For busy families and professionals around Lincoln, convenience matters too. Mobile detailing removes the usual friction. You don’t have to carve out half a day, gather products, or guess whether the seat is drying correctly in your garage.
GP Mobile Car Wash & Detail serves Lincoln and the surrounding area with mobile service and shop service, using non-toxic, fragrance-free, surface-safe methods that fit the kind of leather care described throughout this guide. That matters if you want clean seats without harsh chemical residue, and if you’d rather preserve the vehicle than experiment on it.
A good detailer doesn’t just make leather look better for pickup photos. The primary job is to clean it safely, preserve the finish, and leave it easier to maintain the next time.
If your leather seats are looking dull, dry, stained, or you’d rather have a trained technician handle them safely, book a service with GP Mobile Car Wash & Detail. We provide mobile and shop detailing in Lincoln, Nebraska, using non-toxic, surface-safe methods that protect your interior’s comfort, appearance, and long-term value.