Your car probably looks clean from ten feet away. Up close, it tells a different story. Brake dust is baked into the wheels, the paint feels rough even after a wash, and the interior has that dull look that comes from dust, body oils, and daily use building up in layers.
That’s where the drive-thru wash or the weekend bucket rinse typically reach their limits. The vehicle isn’t just dirty. It’s contaminated, worn in specific ways, and usually protected poorly or not at all. Real car detailing steps fix that by following a strict order that cleans, corrects, and protects without creating new damage in the process.
In Lincoln, that matters even more. We deal with winter salt, sand, summer bugs, tree sap, gravel dust, and plenty of vehicles that work hard year-round. A proper detail has to account for all of that. It also has to change when the vehicle isn’t a standard sedan, because an RV, boat, or fleet van needs a different workflow than a commuter car.
Beyond the Drive-Thru Wash A Professional Approach
A Lincoln driver runs through a tunnel wash on Saturday, parks in the sun, and the SUV looks decent until Monday. Then the missed bug splatter shows up on the mirrors, the lower doors still feel gritty, and hard water spots start to show on the glass and hood. That is the gap between a quick wash and a real detail.
Professional detailing follows a set order because every step affects the one after it. Chemical Guys lays out that sequence in its detailing flow chart overview, from the dirty work up front to drying and protection at the end. That part matters more than product hype. I have seen expensive soaps and coatings fail because the prep was sloppy, and I have seen basic products do solid work because the process was clean.
Order controls risk.
If wheels are cleaned after the paint, grime and wheel cleaner can end up back on washed panels. If bonded contamination stays on the surface before polishing, the pad can drag that material across the paint and leave fresh marring. If the vehicle is not dried properly, minerals in Lincoln water can bake onto paint, trim, and glass before any protection goes on. Owners who want the best way to wash a car without scratching need to pay attention to workflow first, then soap selection.
Why order matters more than product hype
A good detail is controlled, not rushed. The dirtiest areas get handled in a way that does not contaminate cleaner areas. Sensitive surfaces get treated with the right towels, brushes, and chemicals. Correction only starts after the surface is completely clean.
That same logic applies even more on non-standard vehicles. An RV has long vertical panels that dry differently and hold black streaks in seams. A boat brings oxidation, waterline staining, and different gelcoat behavior than automotive clear coat. A fleet van has to balance appearance with downtime, because perfection is not always the goal. Clean, protected, and back in service often is.
What a real detail is trying to do
A proper detail has three jobs:
- Clean with control: remove loose dirt, traffic film, bug residue, interior buildup, and other contamination without adding scratches
- Correct what needs correcting: improve gloss and clarity where swirls, oxidation, haze, or staining are worth chasing
- Protect the result: apply wax, sealant, or coating so the vehicle stays easier to clean and holds its finish longer
That is the professional approach we use in Lincoln. It is built for local salt, summer bugs, gravel dust, work trucks, family SUVs, boats, RVs, and fleet units that do not fit the one-size-fits-all advice you see in generic wash guides.
The Foundation Wheels Tires and Pre-Wash Prep
Pull up to a Lincoln driveway after a week of winter roads, and the filth tells you where to start. Wheels are packed with brake dust, tires are brown, lower panels are sandblasted with grit, and the wheel wells are holding sludge. Starting on the hood in that condition is how a wash turns into scratch repair.
Professional detailers treat wheels, tires, and pre-wash prep as their own stage for a reason. These areas carry the heaviest contamination on the vehicle and the highest risk of cross-contamination. The goal is simple. Contain the worst grime first so it never reaches the paint, glass, or interior towels.
Why wheels always come first
Brake dust is abrasive. Nebraska road sand is abrasive. Winter residue and caked mud are abrasive too.
If wheels get cleaned after the body, runoff and brush splash land on panels you already washed. That wastes time and raises the chance of dragging fresh grit back across the paint. On larger vehicles, the penalty is even worse. RV wheel wells throw grime farther, boat trailers hold salt and road film in tight corners, and fleet trucks usually have neglected tires and lower panels that need stronger cleaning than the painted body does.
A safe workflow looks like this:
- Rinse wheels, tires, and wheel wells first.
- Apply wheel cleaner and tire cleaner separately if needed.
- Agitate with dedicated brushes only.
- Rinse thoroughly before any paint contact.
- Pre-treat bugs, rocker panels, and other heavy buildup.
- Apply pre-wash foam or pre-soak to the exterior.
That order keeps the dirtiest work isolated.
The tools that actually matter
Good results come from separation, not from owning every gadget on the shelf.
- Dedicated wheel cleaner: Needed for brake dust, road film, and the film that sticks behind spokes and inside barrels.
- Tire brush with real stiffness: Tires hold old dressing, oxidation, and brown residue that a wash mitt will glide over.
- Wheel barrel brush: Deep barrels stay dirty even when the face looks clean. That leftover grime slings out later.
- Separate bucket, towels, and brushes: Wheel media should never touch paint. No exceptions if you care about finish quality.
- Pre-wash product: Foam or citrus-based pre-soak helps loosen traffic film before hand washing.
For home washing, technique matters more than effort. The best way to wash a car without scratching starts with separating filthy areas from sensitive ones, using enough rinse water, and avoiding hard scrubbing on dry or gritty surfaces.
Wheels and lower panels hold the contamination that causes avoidable wash marring. Treat them like a separate job.
Tire cleaning is not just cosmetic
A lot of DIY jobs leave the tires looking dark for a day and brown again a week later. The problem is old dressing and embedded grime left in the rubber. If the sidewall is not properly cleaned first, fresh dressing sits on top of residue and fails early.
Scrub until the foam stops turning brown. Then rinse and reassess. On work trucks and fleet vehicles, it often takes more than one pass because the buildup is heavier and the rubber has seen more heat cycles, road oil, and cheap silicone dressings. Boats and RVs bring a similar issue on trailer tires, which are often ignored until cracking or staining gets obvious.
Pre-wash is the part that prevents damage
Many scratches happen before the contact wash ever begins. The vehicle is dusty or gritty, the mitt goes straight to the paint, and the clear coat pays for it.
Pre-wash gives chemicals time to break down traffic film, bug remains, and loose grime so more contamination rinses away first. That matters on daily drivers, but it matters even more on large and odd-shaped vehicles. RVs trap black streaks below seams and trim. Boats towed on highways collect bugs and road film on the bow and trailer. Fleet vans build up grime on rear doors and around logos, where aggressive scrubbing can wear edges and leave uneven results.
What pre-wash handles best
| Area | What builds up there | Why pre-wash helps |
|---|---|---|
| Front bumper | Bugs, road film, grit | Softens debris before contact |
| Rocker panels | Salt, mud, sand | Reduces scratching during wash |
| Rear hatch or trunk | Traffic film, soot | Helps rinse off grime cleanly |
| Wheel arches | Packed dirt, slush residue | Loosens heavy buildup early |
Common mistakes that create extra work
Some shortcuts save two minutes and cost you an hour later.
- Using one brush everywhere: Wheel grit ends up on paint and leaves marring.
- Skipping the tire scrub: Dressing fails fast and the tire still looks dull.
- Using household degreasers or cleaners: They can stain trim, dry rubber, and strip protection unevenly.
- Underestimating wheel wells: A clean fender and a filthy liner make the whole vehicle look half-finished.
- Scrubbing before rinsing: Grit gets trapped in the brush or mitt and dragged across the surface.
This stage does not produce the dramatic gloss people notice first. It does determine whether the rest of the detail goes smoothly or starts with avoidable damage. In our Lincoln service area, that difference shows up fast on family SUVs, farm pickups, RVs, boats, and fleet units that live in real weather and real road grime.
The Main Event Washing Decontamination and Drying
A black pickup can leave a driveway in Lincoln looking clean and come back from one careless wash covered in fresh swirls. I see that a lot on daily drivers, work trucks, and fleet units that get washed often but not washed carefully. The goal here is simple. Remove what is on the surface without adding new damage.
Washing, decontaminating, and drying work as one stage. If the wash is rough, you grind grit into the paint. If decontamination is skipped, polishing pads load up faster and protection sits on top of bonded contamination. If drying is sloppy, water spots and towel marks undo the work you just paid for.
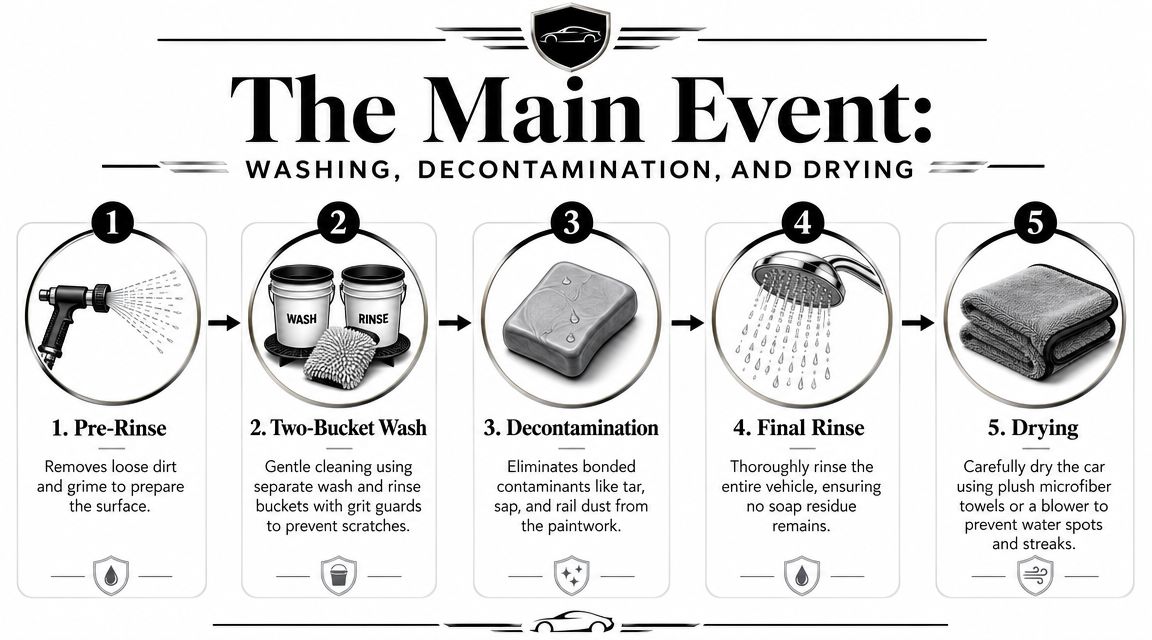
Wash with a plan, not just soap and water
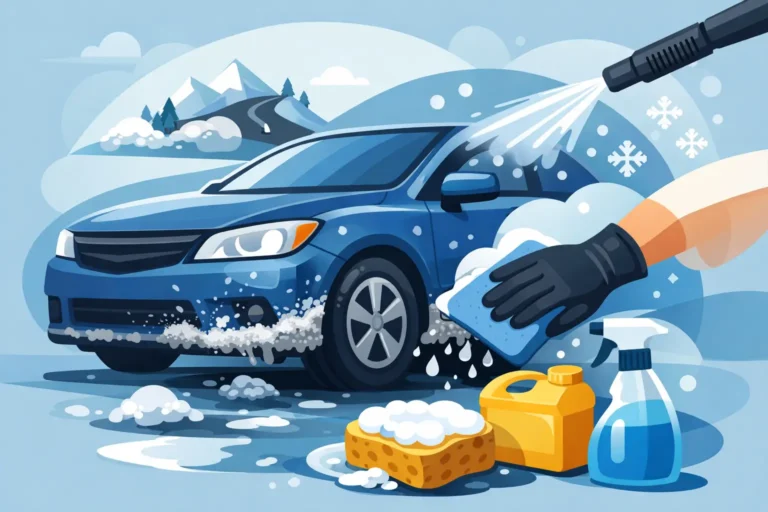
A safe maintenance wash still comes down to control. Two buckets with grit guards are a solid baseline for hand washing. One holds your shampoo mix. The other is for rinsing the mitt so the dirt comes off there instead of going back onto the paint.
Start at the top and work down. Roof, glass, hood, upper doors, mid panels, then lower sections. Lower panels carry the worst grit, especially after Nebraska rain, winter salt, and gravel road dust. On RVs and boats, the same rule applies, but the size of the surface matters even more. Break the job into sections so soap does not dry before you rinse, and use stable platforms instead of overreaching and dragging a mitt across dry paint.
A wash pattern that prevents avoidable marring
- Upper panels first: Roof, hood, upper glass, and trunk or hatch
- Middle panels next: Doors, fenders, and quarter panels
- Lowest areas last: Rockers, lower bumpers, and areas behind the wheels
- Separate wash media if possible: One mitt for cleaner paint, another for lower grime
- Rinse often: A loaded mitt stops cleaning safely
That last point matters on fleet vans and farm trucks. Rear doors, lower bedsides, and logo edges trap grime that does not rinse free easily. Scrubbing harder usually makes the finish worse.
Decontamination removes what washing leaves behind
Paint can look clean and still feel rough. That roughness usually comes from bonded contamination like rail dust, industrial fallout, tar, sap residue, and stubborn film that survived the wash. If it stays there, polishing gets less efficient and wax or sealant does not sit as evenly as it should.
Use the bag test after the wash and before protection. Put your hand inside a thin plastic bag and glide it lightly over the paint. If it feels gritty, the surface needs decontamination.
A clay bar or clay mitt with proper lubricant pulls those bonded particles off the surface. The method depends on the vehicle and the condition. Clay bars give better control on softer or more delicate paint. Clay mitts are faster on large vehicles like RVs, fleet vans, and boats, where time matters but surface area can get out of hand quickly. If you have not dealt with that step before, this guide on what clay bar treatment does for cars explains why a freshly washed vehicle can still be holding contamination.
Use a light hand. Aggressive claying on dry or dirty paint can leave marring, especially on black vehicles and softer clear coats.
Drying is part of paint preservation
Drying should be treated like contact washing. The wrong towel, too much pressure, or delayed drying can put marks right back into the finish. Hard water makes that worse, and Lincoln area vehicles see plenty of mineral spotting once water sits on warm panels.
Forced air helps first. Blow water out of mirrors, grilles, trim seams, emblems, fuel doors, lug recesses, and around marker lights on trucks and RVs. Then follow with clean microfiber drying towels. Blot or pull the towel lightly across the panel. Do not grind it in.
Drying mistakes that cause rework
| Mistake | What it causes |
|---|---|
| Using bath towels or low-quality microfiber | Fine scratching, drag, lint |
| Letting rinse water dry on the panel | Water spots and mineral residue |
| Using one soaked towel for the whole vehicle | Reduced absorption and more streaking |
| Missing crevices, mirrors, badges, or trim | Drips later, especially after the vehicle moves |
For mobile jobs, low-water and rinseless methods can work well if the vehicle is only lightly to moderately dirty and the wash media stays clean. I would not use that approach on a mud-heavy farm pickup, a bug-loaded RV front cap, or a boat trailer covered in road film. Different vehicles need different levels of caution. Good detailing is not about forcing one method onto every job.
What the vehicle should look and feel like at this stage
After washing, decontaminating, and drying, the surface should be clean, smooth, and free of standing water. Door jamb drips, rough paint, and fresh towel marks mean the job is not ready for the next step yet.
That standard matters whether you are caring for a family SUV or maintaining a Lincoln fleet account. Clean paint is only half the result. Clean paint without new damage is the ultimate target.
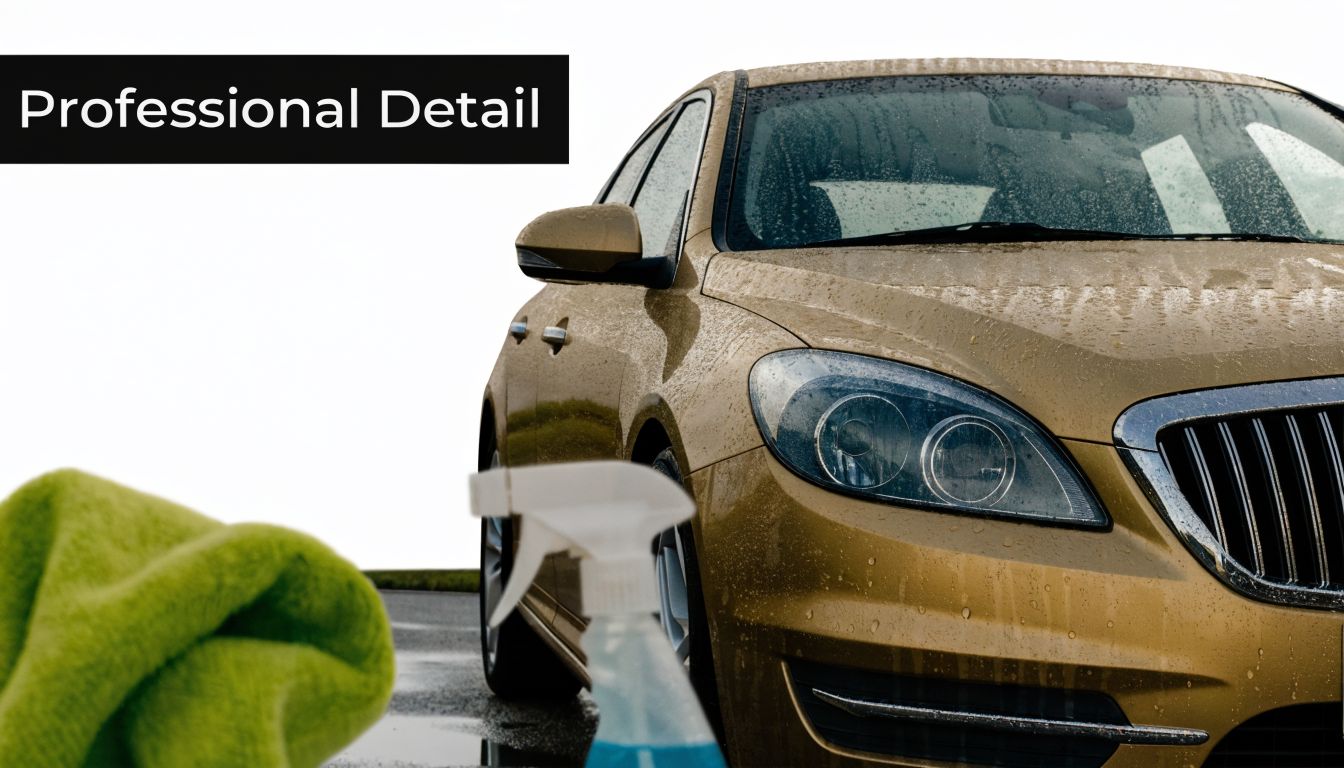
Achieving Perfection Paint Correction and Polishing
A black pickup rolls into the shop looking clean after a wash, then the sun hits the hood and every circular scratch shows up at once. That is the point where owners realize washing and polishing are two different jobs.
Paint correction is controlled abrasion. The goal is to refine the surface enough that light reflects evenly again, without taking off more clear coat than the finish can spare. Gloss comes from flatter, cleaner paint. Wax and coatings only highlight what is already there.
Why polishing can help or hurt
This part of detailing rewards patience more than aggression. A machine, a cutting pad, and a strong compound can remove defects fast. They can also leave haze, burn an edge, or thin a repainted panel if the operator guesses wrong.
That is why I treat correction as a measurement and testing process first, then a polishing process second. On a daily driver in Lincoln, that may mean accepting a few deeper scratches so the paint stays healthy for years. On a garage-kept weekend car, it may make sense to chase a higher level of finish because the owner will maintain it carefully. Different goals change the plan.
What correction can fix, and what it cannot
Some defects respond well to polishing. Others need touch-up, repainting, or realistic expectations.
- Swirl marks and wash marring: Usually improve well with a one-step or two-step polish.
- Oxidation and dullness: Often clear up if the paint still has sound material to work with.
- Light water spot etching: Sometimes correctable, depending on how deep the minerals or etching went.
- Deeper random scratches: Often reduced, not fully removed.
- Rock chips and peeling clear coat: Polishing will not replace missing paint.
- Thin or failing paint: Preservation matters more than chasing perfection.
The safest correction is the one matched to the paint, not the one with the biggest before-and-after claim.
A professional correction workflow
Good correction starts with inspection under proper lighting. Sunlight, handheld lights, and shop LEDs all reveal different defects. Then comes a test spot. I pick the least aggressive pad and polish combination that has a real chance of improving the finish, work a small section, wipe it down, and inspect again. If the result is good, that combo becomes the plan. If not, I adjust one variable at a time.
That step saves time and paint.
A typical workflow looks like this:
- Inspect the paint, including edges, body lines, and any repainted panels.
- Choose a test area on the worst representative section.
- Start with a mild polish and pad before stepping up in cut.
- Wipe away polishing oils and check the true finish under honest light.
- Repeat panel by panel with clean pads and controlled heat.
- Refine with a finishing polish if the owner wants more gloss and clarity.
Dual-action machines are the safest choice for most owners and for many professional jobs. Rotary polishers still have their place, especially on gel coat, heavy oxidation, and some large flat panels, but they raise the skill requirement and the risk.
Trade-offs for cars, RVs, boats, and fleets
Generic online advice generally proves insufficient. A compact sedan, an RV front cap, a wake boat with oxidized gel coat, and a fleet van that lives outside all need different correction plans.
RVs and boats often have larger panels, more oxidation, more trim to protect, and surfaces that build heat differently. Fleet vehicles add another constraint. Downtime matters. The right answer for a work van is often a one-step correction that improves gloss and cleans up branding appearance without tying the vehicle up for two days. A boat may need heavier oxidation removal on gel coat than any passenger car would tolerate. An RV can look dramatically better with careful compounding and polishing, but roof edges, decals, and older fiberglass need a cautious hand.
That is one reason local experience matters. In Lincoln, we see everything from winter-worn SUVs to farm trucks, service vans, campers, and lake-bound boats. The process has to fit the vehicle, not the other way around.
Why correction matters before coating
A coating does not hide polishing mistakes. It preserves them. If you are weighing long-term protection after correction, this breakdown of whether ceramic coating is worth it after proper paint prep will help you decide where your money is best spent.
Later in the process, this visual walkthrough can help you see what machine polishing looks like in practice.
The best polishing job leaves the paint clearer, sharper, and safer for the next round of ownership. That standard applies whether the vehicle is a family SUV, a boat headed to Branched Oak, or a fleet unit that needs to represent a business well every day.
The Final Layers Protection and Interior Deep Clean
Once the exterior is properly cleaned and, when needed, corrected, the final layer decides how long those results stay visible. In trade terms, the work starts paying rent. Without protection, a freshly detailed vehicle begins sliding backward the first time it faces sun, water, dust, and daily handling.
Industry experts point to the wash phase and the paint protection application as the two most critical steps in the sequence. Washing removes abrasive contamination and reveals the true condition of the surface, while the protection step determines how long the improvement lasts, as explained in this detailing discussion on wash and protection as the two key pillars.
Choosing the right kind of protection
Not every vehicle needs the same last-step product. The right choice depends on goals, storage, maintenance habits, and how much prep work went into the paint.
Quick comparison of common protection options
| Protection type | Best for | Trade-off |
|---|---|---|
| Wax | Owners who like a traditional look and frequent upkeep | Shorter-lived and more maintenance-heavy |
| Sealant | Daily drivers needing durable paint protection | Usually less of the warm glow some people like from wax |
| Ceramic coating | Owners who want long-term protection and easier maintenance | Prep matters more, and application standards are stricter |
Ceramic coatings stand out because they bond with the paint rather than merely sitting on top in the same way a simple wax layer does. That doesn’t make them magic. It means the prep has to be right, the paint has to be honest, and the owner still has to wash the vehicle correctly afterward. If you're comparing options, this overview on whether ceramic coating is worth it helps frame the practical pros and trade-offs.
Protection without maintenance is a short-term win
Even the best protection layer can’t survive neglect. Bird droppings still need to be removed. Hard water still needs to be managed. Bad wash habits still create marring.
That’s why maintenance matters after the detail. Protection should make upkeep easier, not replace upkeep. Owners who understand that get much more value out of the service.
A protection layer buys you time and easier cleaning. It doesn’t give you permission to ignore the vehicle.
Interior work is a separate process, not an afterthought
A real detail doesn’t stop at shiny paint. Interior surfaces hold dust, oils, food residue, spills, and bacteria in ways that a quick vacuum won’t reach. Professional workflows typically isolate interior work from the exterior to prevent cross-contamination, and interior extraction uses heated solutions to remove embedded dirt, oils, and bacteria beyond what home vacuuming can do, according to the earlier Auto Finesse guidance already noted above.
That separation matters. You don’t want wheel grime on interior tools, and you don’t want greasy interior dressings transferred onto glass or paint towels.
A solid interior deep-clean routine usually includes
- Vacuuming with crevice tools: Seats, rails, console edges, and under-seat areas collect more debris than most owners realize.
- Fabric or carpet extraction: Heated extraction helps flush embedded grime from soft surfaces.
- Steam cleaning where appropriate: Useful for tight areas, textured plastics, and sanitation-focused cleaning.
- Leather cleaning and conditioning: Leather needs cleaning before conditioning, not product piled over body oil and dirt.
- UV protection on plastics and vinyl: Helps slow fading and keeps trim from drying out.
- Dedicated glass cleaning: Interior glass haze is common and should be treated as its own final step.
The finish should feel complete inside and out
The best details have a balanced feel. The paint is slick and protected. The wheels and tires look clean, not greasy. The glass is clear from every angle. The interior smells clean without being overloaded with fragrance, and the surfaces feel dry and natural instead of oily.
That’s when the car detailing steps have worked together instead of fighting each other.
Specialized Detailing for RVs Boats and Fleets
A Lincoln owner pulls in with a fifth wheel streaked black down the side, a wake boat with chalky gelcoat, or three work vans that need to be back on the road by morning. A generic car-detail checklist stops being useful fast.
RVs, boats, and fleet units need different products, different tool access, and a different order of operations. The surface area is larger, the materials change panel to panel, and the cost of a bad process is higher. On a car, one wrong brush might leave marring on a fender. On an RV roof or oxidized boat hull, the same kind of mistake can turn into hours of correction or permanent wear.
RVs need a top-down wash plan and material awareness
An RV combines painted panels, fiberglass, decals, plastic trim, rubber seals, window surrounds, awnings, and often a roof material that should not be scrubbed like automotive paint. The size alone changes the job, but the challenge is runoff and contamination control.
Start high. Always.
If lower panels are cleaned first, roof runoff can drag oxidation, grime, and black streak residue right back over finished sections. Front caps usually carry bug load that would be extreme on a passenger car. Sidewalls often show oxidation or streaking below trim and sealant lines. Ladder mounts, vents, and roof edges hold grime that a drive-through wash never reaches.
RV work changes in a few specific ways
| Area | Standard car approach | RV-specific adjustment |
|---|---|---|
| Roof and upper body | Often limited attention | Clean upper sections first so runoff does not re-soil sidewalls |
| Exterior materials | Mostly painted clear coat | Check for fiberglass, decals, gelcoat, roof membrane, and sensitive trim before choosing chemicals |
| Access | Hand reach around most panels | Use safe ladders, poles, platforms, and section the vehicle to keep work controlled |
| Interior | Cabin cleaning | Treat it like a compact living space with vents, cabinets, walls, and soft goods |
Inside the RV, the job also shifts. Dust drops from vents, valances, and cabinets onto everything below. Clean those upper surfaces before flooring, upholstery, and entry steps or the work gets repeated.
Boats punish the wrong product choice
Boat detailing is where car advice causes expensive damage. Gelcoat can oxidize heavily, hold waterline staining, and respond very differently to compounding and protection than modern automotive clear coat. Non-skid decking adds another problem. It needs to be clean without becoming slippery.
That changes pad choice, chemical choice, and expectations.
A boat with moderate oxidation may need a stronger cut than a car, but that does not mean reaching for the harshest method available. The goal is to remove dead material without burning edges, staining surrounding trim, or leaving a finish that re-oxidizes quickly because it was not sealed properly. Hardware, cleats, storage lids, and tight seams also slow the work down. There are more interruptions in the surface.
Boat-specific trouble spots
- Gelcoat oxidation: Needs correction matched to gelcoat, not assumptions based on car paint.
- Waterline and dock residue: Often requires targeted cleaners before polishing starts.
- Non-skid surfaces: Need dedicated cleaning tools and products that leave grip intact.
- Metal fittings and trim: Overspray and aggressive compounds can stain or lodge in edges.
- UV exposure: Protection has a shorter margin for error because sun damage is constant.
I tell owners the same thing every season. If a boat looks dull, don’t guess with a shelf full of automotive products. Test a small section first, then build the process around the result.
Fleet detailing is a maintenance system, not a one-time rescue
Fleet vehicles have a different job. They need to stay clean enough to represent the company, protect graphics and paint, and keep interiors usable for drivers who treat the cabin like a mobile office, lunch room, and mud room.
Consistency matters more than perfection.
For fleets, the best plan is usually scheduled maintenance with occasional heavier resets. Chasing full correction on every service wastes time and budget on vehicles that need uptime. Smart fleet detailing focuses on safe washing, presentable wheels and tires, wipe-downs that do not leave greasy residue on controls, and protection that makes the next wash easier.
Fleet owners usually care about
- Downtime: Cleaning has to fit around routes and job schedules.
- Consistency across units: One clean van and four neglected ones still looks sloppy.
- Graphic and trim protection: Repeated harsh washing can dull wraps, lettering, and textured plastics.
- Interior function: Dust, salt, coffee, and jobsite debris build up fast in work vehicles.
- Budget control: Maintenance service usually costs less than correcting months of neglect.
What holds up in Lincoln, NE
Lincoln weather is hard on specialty vehicles. Spring and summer bugs load up front caps and mirrors. Dust settles into seams and step areas. Winter salt works into wheel wells, lower panels, trailer fronts, and fleet interiors. Long highway miles add another layer, especially on RVs and service vans.
The process has to match that reality.
What works here is simple and disciplined. Separate tools by surface. Break large vehicles into sections so soap does not dry where the wind hits hardest. Choose chemicals based on paint, gelcoat, vinyl, rubber, or interior material instead of trying to clean everything with one soap and one brush. Put vehicles on a maintenance schedule before oxidation, staining, and salt buildup turn a routine detail into restoration work.
What fails is just as predictable. Scrubbing RV decals with the wrong cleaner. Treating a boat hull like a pickup bedside. Running fleet vans through quick washes that miss roof edges, bugs, wheel wells, and door jambs week after week.
If you own an RV, boat, or fleet unit around Lincoln, the right detail starts with the vehicle type, how it’s used, and what materials are on it. GP Mobile Car Wash & Detail handles mobile and shop-based detailing for daily drivers, larger specialty vehicles, and working fleets, with service options built around correction, protection, interior cleaning, and real-world maintenance.