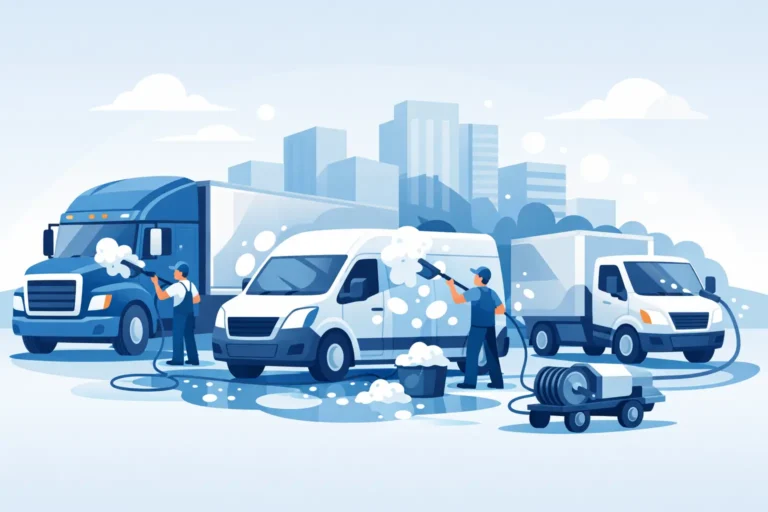
You pull into a stop after a long run, step out, and see the same thing most drivers see. Bugs baked onto the bumper. Diesel film on the tank. Salt and grime packed into the undercarriage. Dust, crumbs, and coffee stains all over the cab.
That truck doesn’t need a quick rinse. It needs detailing a semi truck the right way, from the underbody up through the sleeper, with methods that clean without beating up paint, trim, seals, or interior materials. A proper detail protects a major asset, keeps the driver’s space livable, and makes routine inspections easier because dirt isn’t hiding leaks, corrosion, or damage.
More Than a Wash Why a Full Detail Matters
A tractor comes off the road looking dirty. The bigger problem is what stays on it after a fast wash. Salt sits in seams and around hardware. Diesel residue hangs on tanks and steps. Fine grit sticks to lower panels, then gets rubbed into paint and polished metal the next time somebody cleans it in a hurry.

That is the line between a wash and a detail.
A wash improves appearance for the day. A full detail removes the contamination that shortens the life of paint, metal, trim, flooring, and interior surfaces. For fleets, that means better presentation and fewer hidden problem areas. For an owner-operator, it means protecting a truck that has to earn every week.
The freight side of the industry depends on these trucks staying in service, and the American Trucking Associations' freight transportation overview makes clear how much freight movement rides on trucking. In the field, that translates to a simple standard. Clean equipment is easier to inspect, easier to maintain, and easier to keep in service without small issues getting buried under grime.
What a real detail changes
A proper detail goes after the areas quick washes miss and does it with the right method for each surface.
- Lower exterior sections get real decontamination: Road film, bug acids, brake dust, and salt buildup are removed from paint, polished aluminum, wheels, steps, fuel tanks, and trim without beating up the finish.
- Problem areas become visible: Once the grime is gone, leaks, loose clamps, rubbed lines, corrosion, and failing seals are easier to catch.
- The cab becomes usable again: Dust in vents, residue on touch points, sleeper grime, and buildup along floor edges get cleaned instead of covered up with a fast wipe-down.
- Surface correction becomes possible: On trucks with bonded contamination, a clay bar treatment for painted and smooth exterior surfaces can remove what a standard wash leaves behind before protection is applied.
A neglected truck looks dirty. A detailed truck looks maintained, and that difference matters when drivers, dispatchers, customers, and DOT inspectors all see the same equipment.
Wash job versus detail job
There is a real trade-off here. A basic wash is faster, cheaper, and useful between full services if the truck is already being kept up. It handles loose soil.
A detail takes longer because the work is selective. We use stronger chemistry only where buildup calls for it, lower pressure where seals and electrical areas need care, and hand cleaning where brushes or rushed passes can leave scratches. That extra time is what closes the gap between getting the truck wet and preserving it.
For mobile fleet service, that approach also saves time in a different way. The job is done on-site, with eco-friendly products and a process built around runoff control, repeatable results, and less downtime for the unit. That is how a full detail protects asset value and gives the driver a cleaner, healthier space to work in.
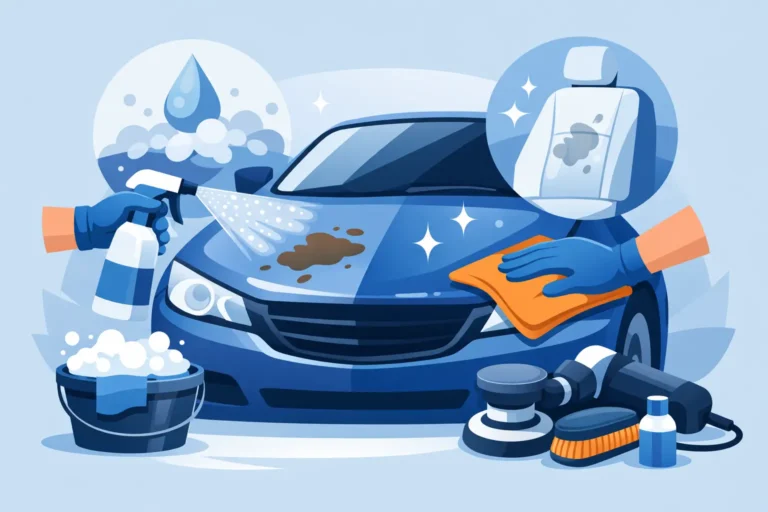
The Foundation for a Flawless Finish
A semi can look like it needs soap and still fail before the wash really starts. I see the same preventable problems on field jobs all the time. Water pushed into bad seals, oxidized panels scrubbed too aggressively, wheel grime dragged onto paint, and crews losing time because the setup was rushed.
Professional detailing starts with inspection and control. On a mobile job, that means setting up for safe footing, keeping tools staged in order, and knowing where runoff is going before the first rinse. That is the difference between a fast cleanup and a detail that protects the truck’s finish, hardware, and resale value.
Start with safety and setup
Park on level ground when you can. If the hood, tanks, stacks, or black paint are hot from sun or recent operation, let them cool before applying chemicals. Heat shortens dwell time, increases spotting, and can stain polished surfaces if product flashes too fast.
Then walk the unit slowly from nose to tail.
Check for:
- Open compartments: Close storage doors, battery boxes, and side compartments before any rinse work starts.
- Sensitive areas: Look for exposed wiring, weak weather seals, loose trim, camera housings, and cracked lenses.
- Existing damage: Note oxidation, failing clear coat, chipped paint, pitted aluminum, torn mud flaps, and missing fasteners.
- Heavy buildup zones: Lower fairings, fuel tank straps, steps, wheel backs, the fifth wheel area, and the rear frame usually need targeted pre-treatment.
The undercarriage needs its own inspection, especially on trucks that run winter roads, quarries, ports, or construction sites. Packed mud, salt residue, and oily grime hold moisture against metal and make leaks harder to spot during service. Cleaning that area is not just cosmetic. It helps maintenance teams see what is going on with the frame, suspension, brake components, and exhaust routing before corrosion and buildup hide the problem.
Practical rule: If the lower half is loaded with grit, break it down with the right chemistry first. Hand contact comes later.
Tools that actually earn their place
Large vehicles punish weak tools and sloppy process. The setup has to cover height, surface area, tight geometry, and heavily soiled zones without wasting motion.
A working kit usually includes:
- Pressure washer: Adjustable pressure and flow matter more than chasing the highest PSI.
- Foam cannon or foaming sprayer: Useful for even pre-soak coverage on trailer walls, bug-loaded fronts, and lower panels.
- Two buckets with grit guards: One for soap, one for rinse water during contact washing.
- Long-reach wash tools: Soft brushes, quality mitts, extension poles, and wheel woolies for deep barrels and awkward angles.
- Dedicated wheel and degreaser brushes: Keep these separate from painted surfaces.
- Drying towels and forced air: Towels handle broad panels. Air helps clear mirrors, emblems, seams, and light housings.
- Surface-specific chemicals: Degreaser, truck soap, glass cleaner, interior-safe cleaner, metal polish, and protectant.
For painted panels that still feel rough after washing, decontamination comes before polishing or sealant work. This explanation of clay bar treatment for painted and smooth exterior surfaces covers why bonded contamination has to come off before protection goes on.
Water-conscious methods matter on fleet work
Mobile fleet detailing has tighter constraints than a fixed wash bay. Water use, runoff control, local discharge rules, and jobsite access all affect the plan. Good crews account for that early instead of trying to fix it halfway through the job.
That usually means using controlled pre-soak application, rinsing with purpose instead of flooding panels, and keeping recovery or containment tools ready where required. The goal is simple. Get the truck fully cleaned without creating a mess around the customer’s yard or wasting labor on avoidable rework. Eco-friendly products matter here too, but so does discipline in how they are used.
Pre-soak first, scrubbing second
A truck covered in bug acid, diesel film, road salt, and baked-on grime should never be attacked with a mitt right away. That is how swirl marks, fine scratching, and missed contamination happen.
Apply pre-soak to the worst areas first. Front caps, mirrors, grille surrounds, steps, fuel tanks, lower doors, trailer noses, wheel arches, rear doors, and lower rails usually need the most dwell. Let the product work, watch it closely on warm surfaces, and rinse thoroughly before any contact wash begins.
That prep step saves labor, reduces marring, and gives a more even result across the whole unit. On fleet work, it also keeps the process repeatable from truck to truck, which is what turns a mobile detail service into a real maintenance asset instead of another wash vendor.
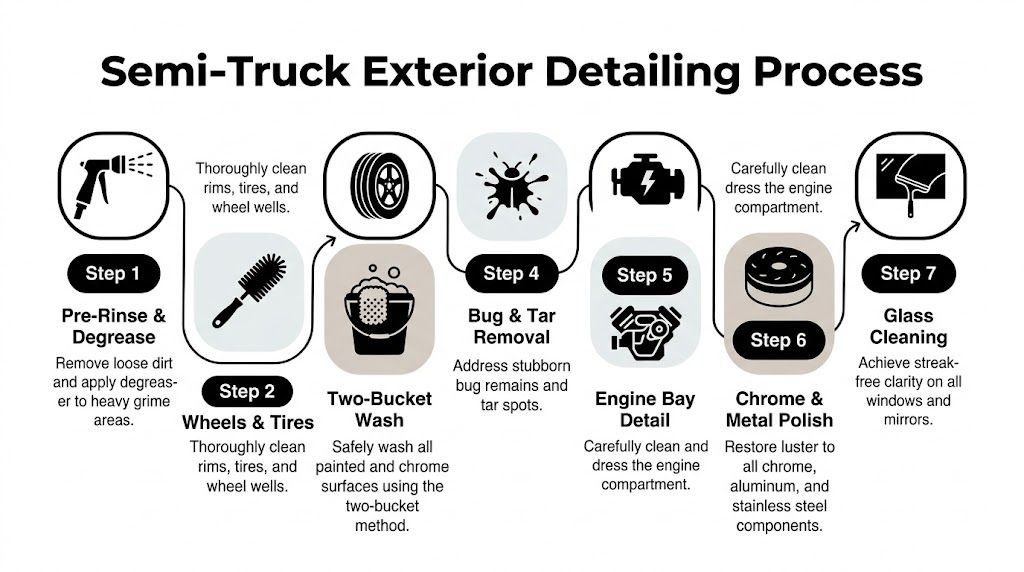
Executing the Complete Exterior Overhaul
Exterior work goes best when it follows a fixed order. Start high, move down, and clean the dirtiest parts last unless a specific area needs early chemical dwell. That keeps grime from splashing back onto surfaces you already finished.
For a professional-grade exterior process, a heavy-duty alkaline foam cannon at pH 12 to 13 with a 5 to 10 minute dwell helps break down road film. A two-bucket wash with grit guards achieves 98% swirl-free results, and a pressure washer set at 1500 to 3000 PSI with a 40° fan tip can remove 90% of salt buildup from the undercarriage, according to Superior Car Wash Supply’s commercial truck detailing best practices.
Pre-rinse and foam application
Pre-rinse the whole unit to remove loose grit. Don’t hold the tip too close to decals, old striping, weak seams, or weathered trim. The goal is to flush contamination away, not drive water into places it shouldn’t go.
Then foam the truck evenly. On heavily soiled rigs, it helps to apply product bottom-up so you can see coverage, then rinse top-down after dwell. Watch the surface while it sits. If product is drying too quickly, conditions are too hot or windy and you need to adjust.
Wash the cab in zones
The tractor is full of varied materials. Painted fiberglass, chrome, polished aluminum, textured steps, bug-covered mirrors, windshield trim, and greasy entry points all react differently.
Work in zones:
- Roof cap and upper fairings
- Windshield surround and mirrors
- Hood, grille, bumper, and front face
- Doors, handles, tanks, and step areas
- Rear cab surfaces and sleeper sides
Use your softest media on the cleanest and most visible areas. Keep separate mitts or brushes for lower panels and bug-heavy front sections. If you mix those tools, you drag abrasive grime into the finish.
Clean trucks from the top down, but clean your tools from the dirty side back to the clean side. That habit prevents a lot of avoidable marring.
Trailer walls and reefer areas
Trailer sides can fool people. They may not look filthy until the soap starts moving and you see oxidation lines, road film, and drip marks. Long, flat surfaces need patience. Rushing creates missed bands and uneven results.
A few practical points matter here:
- Aluminum trailers: Watch your chemical strength and dwell time. Aggressive products can leave uneven appearance if they dry.
- Fiberglass or painted boxes: Use gentler wash media and inspect for bonded contamination before deciding on polishing.
- Rear doors and hinges: They trap grime fast. Spend extra time around latches, rivet lines, and perimeter seals.
- Reefer fronts: Keep pressure controlled around vents, housings, and sensitive equipment.
Wheels, tires, and wheel wells
Wheels are where a detail either looks complete or half-finished. On semis, they also eat time because brake dust, road tar, grease, and caked mud collect in layers.
Use dedicated brushes and a dedicated rinse cycle. Clean tire sidewalls until the brown residue is gone, not just until the visible mud is off. Hit wheel wells and mud flap mounts too. A bright tank and shiny cab sitting over dirty wheel areas never looks right.
Undercarriage and lower rails
This is the part a lot of people skip because it’s awkward. It’s also where winter buildup and corrosive residue do real damage.
Aim rinse water at multiple angles instead of blasting one straight path. Work the frame, suspension areas, crossmembers, exhaust path, and lower structure thoroughly. Stay controlled around air lines, connectors, and sealed components. The job is to flush away contamination without forcing water into vulnerable points.
Engine bay and greasy mechanical zones
An engine bay detail is useful, but it needs discipline. Cover what needs protection. Avoid flooding electrical connections. Use degreaser where grease is instead of soaking the whole compartment indiscriminately.
Warm metal helps degreaser work. Hot metal creates problems. There’s a difference.
Agitate greasy spots with brushes, rinse carefully, and blow out standing water where possible. Finish with a dressing only on appropriate plastics and rubber, and keep it off belts and anything that shouldn’t be slick.
Final touch work
The truck stops looking merely washed and starts looking detailed.
Use:
- Bug remover where needed: Especially on mirrors, bumper faces, and windshield perimeter.
- Tar treatment selectively: Spot-treat contamination instead of overapplying solvent.
- Metal polish: Chrome stacks, tanks, and trim pieces respond well when they’re properly cleaned first.
- Glass cleaner: Finish windows and mirrors last so overspray doesn’t undo the work.
Walk the truck one more time in different light if you can. Side lighting exposes streaks, missed drips, and leftover residue better than overhead light does.
Restoring the Driver's Command Center
A semi cab tells you how the truck is being lived in. Some are lightly dusty. Others have snack debris packed under the seats, coffee rings in the console, grime on the wheel, and sleeper shelves that haven’t been emptied in months.
Interior detailing works best when you treat the cab like a small apartment with lots of plastic, vinyl, fabric, electronics, and tight corners. If you rush the first step, the rest turns into chasing dirt around.

Start by blowing debris out
For interior semi cab work, the most efficient first move is compressed air at 90 to 120 PSI to blow loose debris from floors, seams, crevices, and under-seat tracks toward the door. That technique can cut vacuuming time by up to 70%. Pros then work in sections, use pH-neutral cleaners on vinyl and leather, and use steam on headliners to reduce allergens by 80% without oversaturating the material, as shown in this semi-truck interior detailing demonstration.
That method works because vacuuming alone is slow on a lived-in cab. Air pulls crumbs, dust, and grit out of switch surrounds, cup holders, stitching lines, pedal edges, bunk hardware, and dash seams where a vacuum nozzle won’t reach well on its own.
Clean in sections, not by impulse
The easiest way to miss spots is to bounce around the cab. Work one area to completion before moving on.
A practical order looks like this:
- Driver area first: Wheel, column, gauges, dash top, controls, stalks, and vents.
- Doors and side panels next: Handles, pockets, switches, speaker grilles, and sill plates.
- Seats after that: Fabric or vinyl needs the right cleaner and brush pressure.
- Floor and mats last: By then, the debris above has already fallen down where it belongs.
If you clean the floor first, you’ll clean it twice.
Spilled coffee around cup holders and console seams usually needs agitation with a small interior brush and a low-residue cleaner. Greasy steering wheels need a different touch. You want the contamination off the surface, but you don’t want a slick dressing where the driver’s hands go.
Sleeper area and odor control
The sleeper is where basic cleanups usually stop short. Bags, bedding, hard storage surfaces, corners behind seats, and mattress edges hold dust and odor longer than the front cab area.
Odor control works best when you remove the source first:
- Empty trash and personal items
- Vacuum creases and under bunk edges
- Wipe hard surfaces thoroughly
- Treat fabric areas that hold food, smoke, or moisture odors
Masking odor with fragrance doesn’t fix much. If the smell is coming from spilled liquid, damp fabric, or old debris under the bunk, you have to clean that material directly.
Here’s a useful visual walkthrough of interior cleaning techniques in a truck cab:
Material choices matter
Not every interior surface wants the same product.
Use a pH-neutral cleaner on vinyl and leather-style seating surfaces. That helps avoid drying and cracking over time. On screens, gauge covers, and glossy trim, use minimal liquid and a clean microfiber. Overspray is what creates streaking and residue around electronics.
For headliners, use a controlled steam approach rather than soaking. Heavy saturation can loosen adhesives or leave water marks. The goal is light cleaning and freshness, not drenching the material.
Finish for function, not shine
A professional truck interior shouldn’t look greasy. It should look clean, even, and easy to live in.
That means:
- clear glass
- dust-free vents
- a steering wheel with a clean, natural feel
- floor mats that are dry before reinstalling
- trim that isn’t left slippery or glossy enough to reflect into the windshield
The best interior detail is the one a driver notices the next morning when everything feels reset, not perfumed over.
Applying Long-Term Paint and Surface Protection
A clean truck starts looking tired again fast if the surface is left bare. On a working semi, protection is the step that keeps road film, bug acids, detergent exposure, and sun from grabbing hold as quickly after the detail.
Mobile crews see that difference every week. Two trucks can leave equally clean, but the one with proper protection usually washes down faster next time, needs less aggressive chemistry, and holds its finish better between service visits. That matters for owner-operators trying to protect resale value and for fleets trying to keep labor time under control.
Protection options and their trade-offs
The right protection package depends on how the truck runs, where it runs, and how often it can be maintained.
Wax is the budget option. It can add gloss, but on a semi that lives outdoors and gets frequent washes, durability is limited.
Polymer sealants last longer and stand up better to routine wash chemicals. For many working trucks, this is the practical middle ground. You get real surface protection without the higher prep time and cost that coatings require.
Ceramic coatings make the most sense on newer trucks, freshly corrected paint, polished tanks, and units that need to stay cleaner with less effort. Prep has to be right or the result will disappoint. If the surface still has oxidation, embedded contamination, or buffer haze, coating over it just locks those defects in place. A good overview of those differences is in this guide to best paint protection options for newer vehicles.
Why ceramic works well on hard-used equipment
Ceramic is useful because it changes maintenance. Dirt releases easier. Bugs wash off with less scrubbing. Drying gets faster, and protected panels are less likely to look chalky after repeated exposure.
It is not a substitute for washing correctly. We still use proper mitts, dedicated towels, and eco-friendly products that clean without stripping the surface unnecessarily. The goal is simple. Keep the truck easier to maintain while reducing wear from harsh repeat cleaning.
Where protection delivers the best return
Some surfaces earn the extra time right away:
- Front cap, grille surround, and mirrors: constant bug load and road spray
- Hood and leading edges: heavy UV exposure and frequent wash contact
- Fuel tanks and polished metal: easier cleanup, less staining, better appearance retention
- Door handles, steps, and sleeper sides: high-touch areas that collect grime fast
- Glass and mirrors: treated surfaces shed water better and clean up with less effort
Protection is maintenance, not decoration. A semi is a revenue-producing asset, and every detail choice should support uptime, driver presentation, and longer surface life. That is where a professional detail separates itself from a basic wash.
How Mobile Services and Fleet Plans Streamline Detailing
A truck comes off route late, the yard is muddy, and the driver still needs to log paperwork, fuel, and get some rest. That is not the time to ask him to chase a wash bay or spend an hour trying to clean polished tanks with a brush and a bucket. Mobile detailing solves a scheduling problem first, then improves the finish.
For owner-operators and fleets, the main advantage is control. The truck stays where it already parks. The crew arrives with water supply options, containment methods where needed, ladders, pressure equipment, safe chemicals, and a process that fits commercial equipment. That keeps downtime tighter and results more consistent than handling truck care only when someone finds a free afternoon.
Why on-site service works better for busy operations
Every off-site wash adds unbilled time. The unit leaves the yard, waits, gets cleaned to whatever standard that location follows, then comes back dirty again if weather or road spray turns halfway through the trip.
On-site service cuts out that extra loop. It also lets the detail crew work around dispatch, fueling, loading, and driver availability. For fleets, that matters more than convenience. It means truck appearance, surface care, and cab cleanliness can be scheduled like any other maintenance item instead of getting pushed back until buildup is harder to remove.
A good mobile crew also works differently than a basic wash line. We can adjust chemistry for bug-heavy front caps, winter salt, greasy frame areas, polished metal, and sleeper interiors without treating every truck the same. That is the gap between a rinse-down and a professional detail that protects asset value and keeps the cab livable for the driver.
Fleet plans beat one-off cleanups
One-time details still have a place. They make sense after a hard winter run, before a sale, after a neglected period, or when a new account wants every unit reset to a higher standard.
Recurring fleet service usually delivers better long-term results. Soil stays manageable. Brush contact can be reduced because contamination is removed earlier. Interiors do not reach the point where stains, odor, and sleeper grime take a half day to correct. That saves labor over time, and it helps the truck hold a more professional appearance between major details.
The other benefit is planning. Once the service interval matches the route and season, managers stop guessing. Units that run salted highways can get more underbody attention. Local trucks with frequent driver turnover can get more interior touchpoint work. Showpiece tractors or customer-facing equipment can get added protection on paint, tanks, and brightwork.
What a good service plan should include
Good plans are built around use case, not a generic menu. A day cab on regional work does not need the same schedule or interior scope as a long-haul sleeper crossing multiple weather zones each week.
Useful service plans usually separate:
- Maintenance washes: scheduled exterior cleaning focused on road film, bugs, wheels, steps, and visible grime
- Full details: deeper interior cleaning, stain removal, sleeper cleanup, and more corrective exterior work
- Protection add-ons: sealants or coatings for trucks that need faster cleanup and less aggressive repeat washing
- Fleet-specific priorities: decals, polished tanks, fuel islands stains, winter undercarriage flushing, and high-touch driver areas
If you are comparing options, review fleet vehicle cleaning packages and detailing service levels against how the trucks run. That makes it easier to choose a schedule that fits the operation instead of paying for the wrong scope.
The practical point is simple. Mobile service turns detailing into a repeatable maintenance system. That protects a major investment, reduces wasted driver time, and keeps trucks looking like equipment a professional company takes care of.
Your Semi Truck Detailing Questions Answered
How should you clean the undercarriage without causing damage?
Use controlled pressure, wide spray angles, and multiple passes from different directions. Focus on flushing road salt and packed grime off the frame, suspension, and exhaust path. Avoid forcing high pressure directly into seals, vulnerable connectors, and delicate components.
What’s the best way to remove baked-on bugs and road tar?
Don’t scrape first. Pre-soak the area, let the chemistry dwell, then use dedicated bug or tar treatment as needed. Bugs on mirrors, bumper faces, and the upper grille often need a second pass. Tar should be spot-treated instead of spreading strong solvent across large areas.
Is pressure washing safe around reefer units and engine bays?
It can be, if the operator knows where not to aim aggressively. Keep pressure controlled around electrical components, vents, seals, and housings. Engine bay cleaning should use targeted degreasing and careful rinsing, not flooding.
How often should a semi be washed or detailed?
That depends on route, weather, parking conditions, and whether the truck is long-haul or local. A truck running through winter roads and heavy freight corridors needs more frequent attention than one staying in milder local conditions.
| Service | Long-Haul OTR | Local/Regional Haul |
|---|---|---|
| Maintenance wash | Every 1 to 2 weeks | On a regular scheduled interval based on route conditions |
| Full exterior and interior detail | Seasonally or when buildup becomes substantial | Periodically based on use, driver turnover, and appearance standards |
What’s the most common mistake in detailing a semi truck?
Trying to make up for weak prep with more scrubbing. That’s how surfaces get marred, trim gets stained, and time gets wasted. Good detailing is mostly process. Inspection, pre-soak, correct wash order, surface-specific chemicals, and proper protection do the heavy lifting.
If you want professional help instead of spending your day chasing grime around a tractor and trailer, GP Mobile Car Wash & Detail provides mobile and shop-based detailing in Lincoln, Nebraska with water-conscious methods, non-toxic cleaning solutions, and service options for fleets, RVs, boats, and daily-use vehicles. Whether you need a maintenance wash, a full interior reset, or long-term paint protection, their team can help keep your equipment clean, protected, and road-ready.