Is the once-brilliant paint on your car looking dull, chalky, and tired? Don't rush out for a quote on a new paint job just yet. The great news is that you can often bring that color back to life by restoring the paint you already have. It's a process of deep cleaning and carefully polishing away the damaged top layer to uncover the fresh, vibrant finish hiding underneath.
Why Car Paint Fades and How You Can Fix It
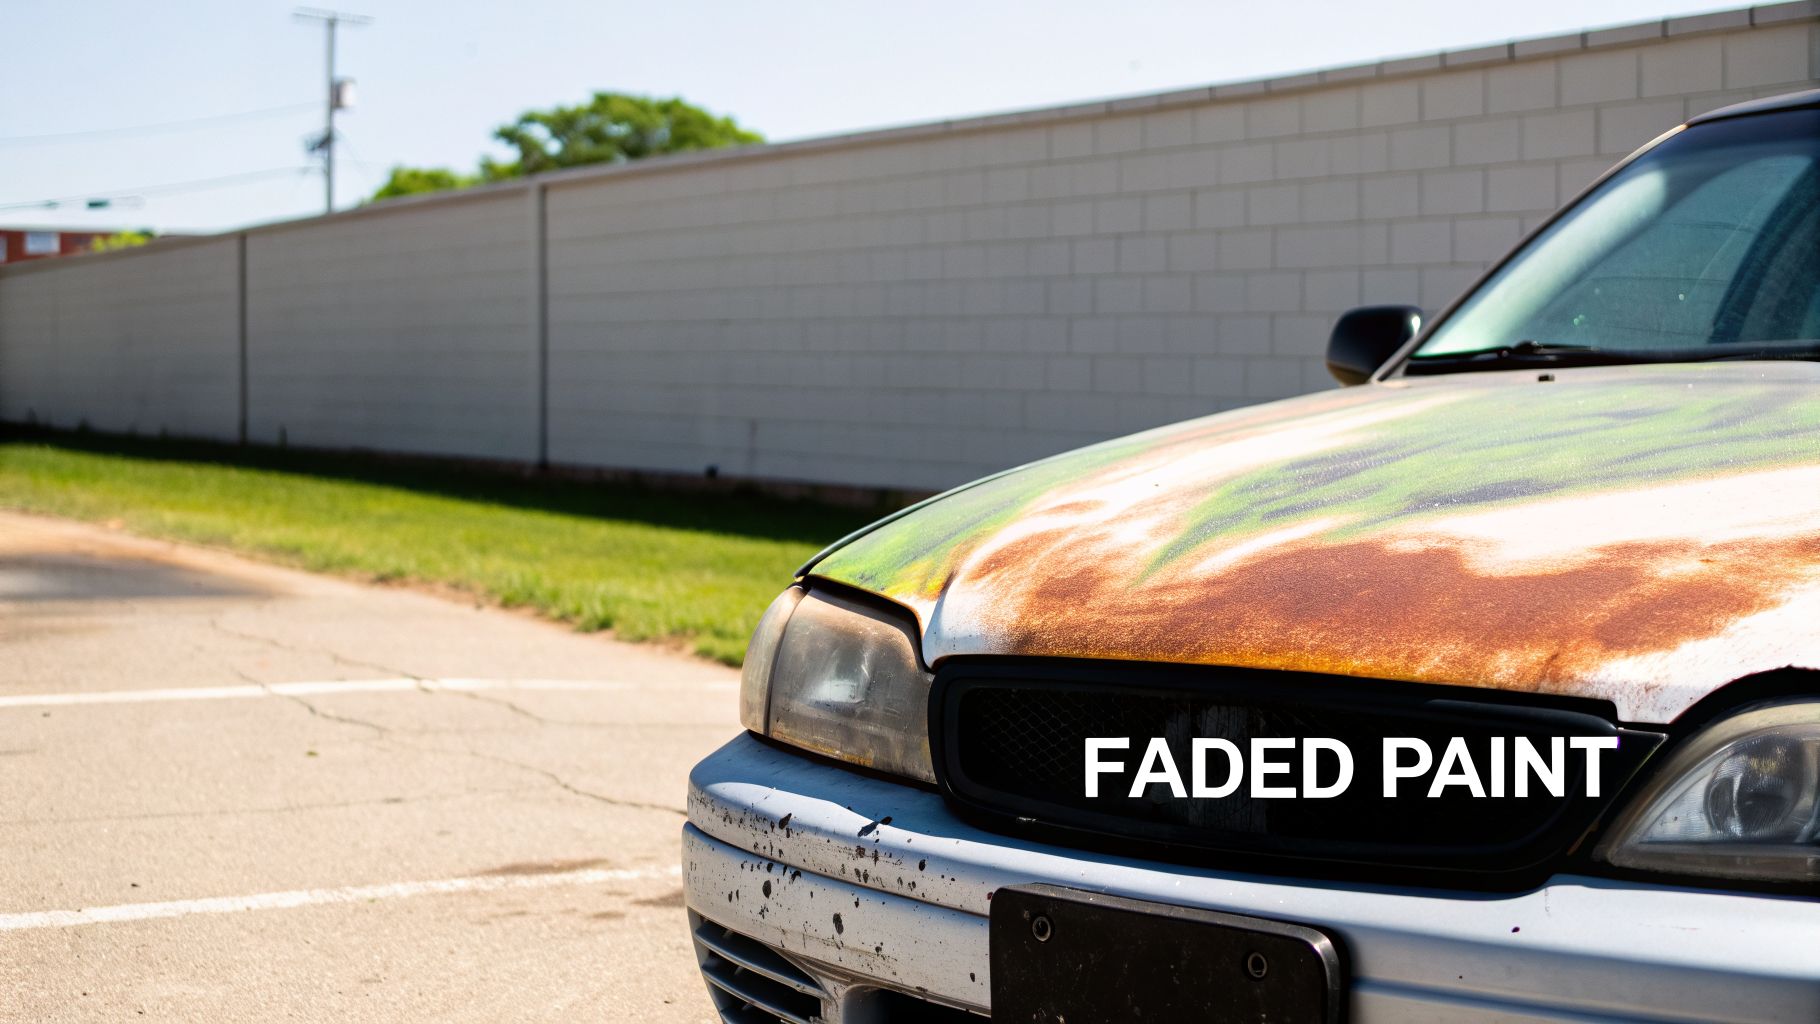
The number one enemy of your car’s shiny finish is the sun. Its ultraviolet (UV) rays are constantly attacking your vehicle's outermost protective layer—the clear coat. Think of it as a relentless assault that slowly wears down the paint's defenses.
This UV attack causes the clear coat to break down in a process called oxidation. As that protective layer degrades, its surface becomes rough and full of microscopic pores. Instead of reflecting light cleanly to create a deep gloss, it scatters the light in all directions. That’s what your eye sees as a dull, faded color.
Beyond Just the Sun
While UV rays do most of the damage, other environmental troublemakers chip in to speed up the fading, especially for cars here in Lincoln, NE, that have to endure our wild seasons.
- Acid Rain & Bird Droppings: These are incredibly acidic and will eat into your clear coat if left to sit. They can create permanent dull spots that look etched into the paint.
- Road Salt & Grime: The stuff we use to treat winter roads is corrosive. It works to wear down your car’s finish, making it much easier for oxidation to take hold.
- Industrial Fallout: You can’t see them, but tiny airborne metal particles from brakes and industry are everywhere. They embed in your paint, creating a rough texture and tiny rust spots.
Want to feel this contamination for yourself? After washing your car, put your hand inside a thin plastic sandwich bag and gently run it over the paint. If it feels gritty or rough instead of perfectly smooth, your paint is covered in bonded contaminants that are killing its shine. We call this the "baggie test."
The Path to Restoration
Luckily, as long as the fading is only on that top layer of clear coat, it's almost always fixable. Restoring faded paint isn’t about adding something new; it's about removing the thin, damaged, oxidized layer to expose the healthy paint underneath.
This is done with a careful, multi-step approach:
- Decontamination: A thorough hand wash, followed by chemical iron removers and a clay bar treatment to get the surface perfectly clean.
- Correction: Using a machine polisher with specific compounds and pads to gently buff away that damaged top layer.
- Protection: Applying a durable layer of wax, sealant, or a ceramic coating to shield the newly restored finish from future damage.
A DIY approach can work for light to medium fading, but it takes a lot of patience, the right tools, and a gentle touch. For severe oxidation or if you want a guaranteed perfect result, calling in an expert like GP Mobile Car Wash & Detail is the best way to get a flawless finish without risking damage to your paint.
The Critical Surface Preparation Phase
Before you can even think about getting that glossy, polished finish, your car's surface needs to be spotlessly clean. This is the non-negotiable first step of any real paint restoration, and frankly, it's where most people go wrong. Trying to polish a car that isn't perfectly prepped is a recipe for disaster.
The goal here isn't just a quick wash; we're aiming for a surgically clean canvas. Any leftover dirt or grit will get dragged across your paint by the polisher, creating a whole new set of scratches and swirls. You’ll end up causing more damage than you fix.
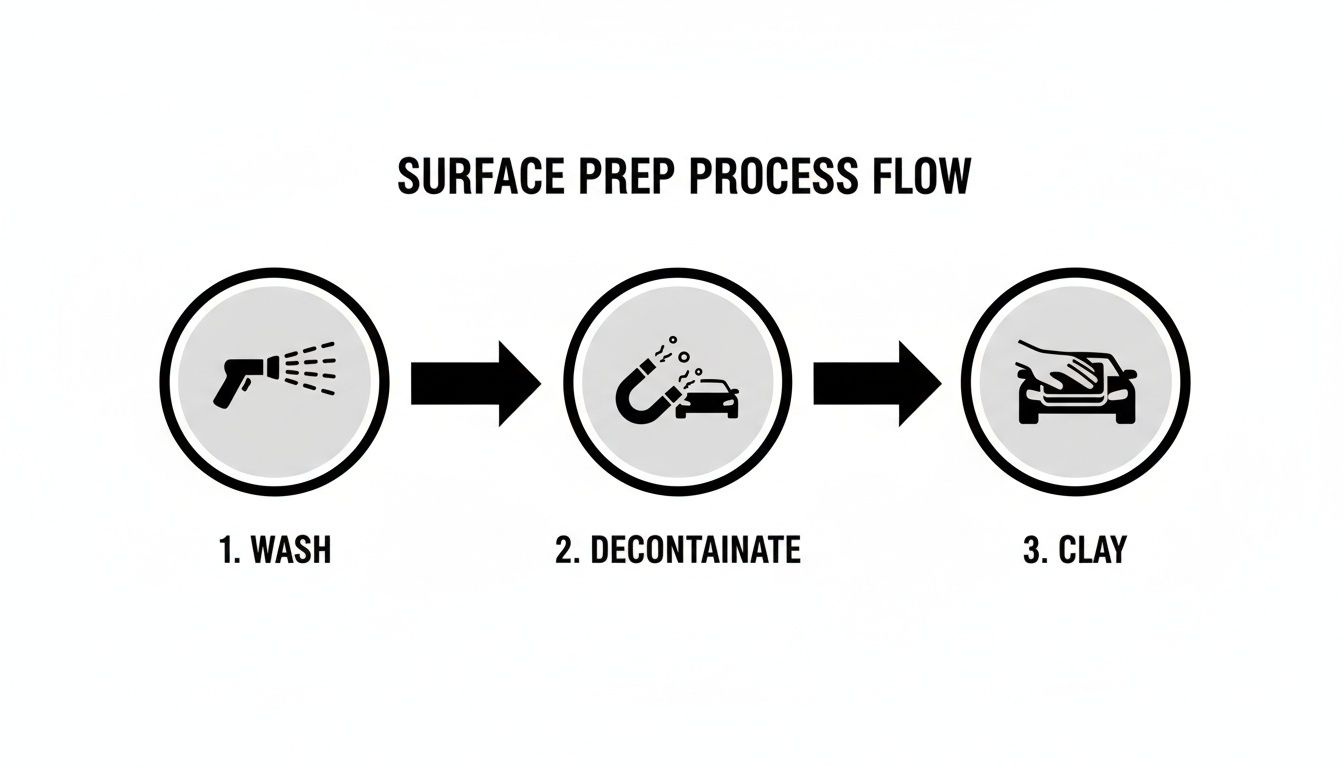
Start with a Proper Two-Bucket Wash
Your first move is a professional-grade hand wash. Ditch the old single bucket and gritty sponge. You'll need two buckets: one for your soapy water and a second one with plain water just for rinsing your wash mitt. This simple technique stops you from grinding the dirt you just removed right back into the paint.
Always use a high-quality, pH-neutral car soap. These soaps are engineered to lift grime away without stripping any existing wax or, more importantly, harming the delicate clear coat. Aggressive cleaners like dish soap are far too harsh and will only make the oxidation you're trying to fix even worse.
The Chemical Decontamination Step
After a good wash and rinse, your car might look clean to the eye, but it’s not. The paint is still covered in invisible contaminants that a normal wash simply can't handle. This is where chemical decontamination comes in to dissolve those stubborn particles.
An iron remover is an absolute must. These products react with tiny, embedded metal bits from brake dust and industrial fallout, dissolving them into a purplish liquid that you can just rinse away. It's a weirdly satisfying process to watch—you can literally see the paint "bleed" as the contaminants are pulled out.
Next, you'll tackle any road tar. Grab a dedicated tar and adhesive remover and apply it to the lower parts of your car and behind the wheels. It will safely melt away those stubborn black specks that would otherwise require harsh scrubbing.
The Final Mechanical Decontamination
The last prep stage is the one you can actually feel: the clay bar. A detailing clay bar is a special, putty-like material that you glide across a lubricated surface. It physically grabs and pulls out any remaining embedded grit that the chemicals didn't get, like tree sap or stubborn pollutants.
You’ll be amazed at the difference. Just spray a clay lubricant on a small section of paint and gently glide the clay back and forth. You will feel the surface transform from gritty and rough to perfectly smooth under your fingertips. Remember to fold the clay often to a clean side so you aren't just dragging the gunk you picked up across the paint.
If you’re new to this step, our detailed guide explains exactly what a clay bar treatment does for your car.
After claying the entire vehicle, give it one final rinse and dry it completely with a clean, soft microfiber towel.
Now your surface is truly clean and as smooth as glass. You are finally ready to start the real restoration work.
Mastering Paint Correction And Polishing
Alright, with the surface totally clean and free of contaminants, we get to the part that delivers that jaw-dropping transformation. This is where we physically level out the damaged, oxidized layer of clear coat to bring back the deep, vibrant paint hiding underneath. It’s the real magic in restoring a faded car.
The process boils down to two main actions: compounding and polishing. I like to compare it to sanding wood. Compounding is your aggressive first pass, like using coarse-grit sandpaper to knock down heavy oxidation and deeper scratches. Polishing is the refinement step, like switching to fine-grit paper to smooth everything out for a flawless, high-gloss shine.
Choosing Your Tools For The Job
While our pro team sometimes reaches for a powerful rotary polisher, the absolute best tool for a DIYer is a dual-action (DA) polisher. These machines are incredibly safe and easy to get the hang of. They oscillate in a random pattern, which massively reduces the risk of burning through your paint—a heartbreaking and expensive mistake we see all too often.
Your choice of compound, polish, and pad is just as crucial as the machine. Think of them as a team that has to work together.
- Compounds: These are packed with more aggressive abrasives. They’re the heavy lifters, designed to cut through that chalky, oxidized layer and remove noticeable defects.
- Polishes: These contain much finer abrasives. Their job is to refine the paint after compounding, clearing up any light haze and creating that deep, wet-looking gloss.
- Pads: You'll find pads in different materials (foam, microfiber, wool) and densities. A firm cutting pad is what you’ll pair with a compound, while a much softer polishing pad is used with your polish.
Matching the right product to the right pad is everything. If you're dealing with moderate fading, you’ll likely start with a medium-cutting pad and a compound. For lighter oxidation, you might get away with a one-step polish and a less aggressive polishing pad.
Of course, none of this matters if the car isn't prepped. The workflow below shows the non-negotiable steps you must take before a polisher ever touches your paint.
Getting this prep work right creates a pristine canvas. It ensures your polishing efforts are effective and, more importantly, that you don’t drag hidden grit across the paint and create a bigger mess.
Perfecting Your Polishing Technique
The secret to a great finish isn't about speed or brute force. It's about consistency and patience. Always work in small, manageable sections, about 2×2 feet at a time. This lets you focus your efforts and get even results across the panel.
Start by dabbing a few small drops of your compound or polish onto the pad. Before turning the machine on, gently spread the product over your work area. This simple trick prevents it from slinging all over your garage the second you hit the power switch.
Pro Tip: Set your DA polisher to a medium speed (usually a 3-4 on the dial). Cranking it to the max doesn't speed up the results; it just builds up heat and dramatically increases the risk of a mistake.
Use a classic cross-hatch pattern. Move the polisher slowly across your section horizontally, then go back over it vertically. This ensures complete and even coverage. Apply just enough pressure to keep the pad flat against the paint—let the machine do the heavy lifting.
After a few passes, grab a clean microfiber towel and wipe the residue away to check your work. The paint should already look noticeably clearer and feel silky smooth.
The IPA Wipe-Down: The Moment Of Truth
Here’s a little industry secret: many polishes have oils and fillers that can temporarily hide fine scratches, giving you a false sense of success. To see what you've really accomplished, you need to do an isopropyl alcohol (IPA) wipe-down.
Mix a solution of 50% isopropyl alcohol and 50% distilled water in a spray bottle. Lightly mist it onto the section you just polished and immediately wipe it off with a fresh microfiber. This chemical bath strips away any leftover oils, revealing the true, corrected surface.
If you still see some fine scratches or haziness, you may need another pass with the polisher. If the surface is brilliant and clear, you've nailed it. You can now move on to the next section with confidence. It feels tedious, but this step is what separates an amateur job from a professional one.
While this process is fantastic for fading, it's not a silver bullet for deeper issues like swirl marks. For a more targeted approach on that, check out our guide on how to remove swirl marks from your car's paint.
DIY vs. Professional: A Reality Check
Professional paint correction can bring back 75-90% of a faded car's original shine by carefully removing just 1-2 microns of the damaged clear coat. It's a delicate operation. However, the DIY failure rate sits around 30%, often because of improper technique or using the wrong products. In a high-UV state like Nebraska, faded paint is a constant battle; local data shows that 62% of vehicles over five years old need some form of paint correction, a fact supported by collision program insights from UTI.edu.
The choice between going it alone and hiring a pro comes down to your comfort level with the risks.
DIY vs Professional Paint Correction Risks and Outcomes
| Factor | DIY Approach | Professional Service (GP Mobile) |
|---|---|---|
| Potential Results | Can achieve good results, but often with minor imperfections or haze left behind. | A near-flawless, deep gloss finish free of swirls, haze, or holograms. |
| Common Risks | High risk of "burning" through clear coat, leaving permanent circular marks (holograms), or creating uneven results. | Minimal risk. Trained technicians use paint depth gauges and proven techniques to work safely. |
| Equipment Cost | Significant upfront investment in a quality DA polisher, pads, compounds, and polishes ($300+). | All-inclusive pricing. We use thousands of dollars worth of top-tier equipment. |
| Time Investment | A full weekend (10-20 hours) for a beginner to properly complete a vehicle. | A matter of hours. We complete the job efficiently without cutting corners. |
| Guarantees | No guarantees. If you make a mistake, the cost of a repaint is on you. | We stand behind our work, guaranteeing a safe process and exceptional results. |
While a DIY project can be rewarding, paint correction is one area where a mistake can be irreversible and costly. If you're hesitant, it's always safer to trust an expert.
Once you’ve successfully compounded and polished the entire car, you’ll be looking at a brilliant, restored finish. But the job isn’t quite done. Now you have to protect that beautiful new surface.
Locking In Your Shine with Long-Term Protection

You've put in the sweat and elbow grease, and your car's paint is finally vibrant and smooth again. That hard work paid off. But if you walk away now, you're leaving that fresh, vulnerable finish exposed to the same sun and grime that caused the damage in the first place.
This final step—protection—is what makes the difference between a shine that lasts a few weeks and one that looks great for years. You need to lay down a sacrificial barrier to take the heat from UV rays, road salt, and bird droppings so your actual paint doesn't have to.
The Classic Choice Carnauba Wax
For generations, the go-to has been carnauba wax. It's a natural product famous for delivering an incredibly deep, wet-looking gloss that car enthusiasts chase. Nothing quite beats the warm glow it gives to a freshly polished color.
The trade-off for that beautiful shine, however, is durability. Carnauba wax is an organic substance, so it breaks down pretty fast when faced with detergents and the elements. You’ll be lucky to get 4-6 weeks of real protection before it's time to reapply.
It’s a fantastic choice for a show car that spends most of its life in a garage, but it’s not the most practical option for a daily driver, especially when you're fighting off the intense Nebraska sun and harsh winter road treatments.
A Modern Upgrade Paint Sealants
That brings us to synthetic paint sealants. These are lab-engineered polymers designed specifically to do one thing: last. A sealant bonds to your paint to form a slick, glassy shell that is far more resistant to heat, UV rays, and chemicals than any natural wax.
While some purists argue a sealant’s shine is a bit “colder” than carnauba's warmth, most people can't tell the difference. What you will notice is the longevity. A quality paint sealant delivers solid protection for 4-6 months—a massive leap in durability.
For anyone who has just spent a weekend correcting their paint, the idea of reapplying protection twice a year instead of every month is a huge relief. Sealants offer the perfect balance of shine, protection, and practicality for most drivers.
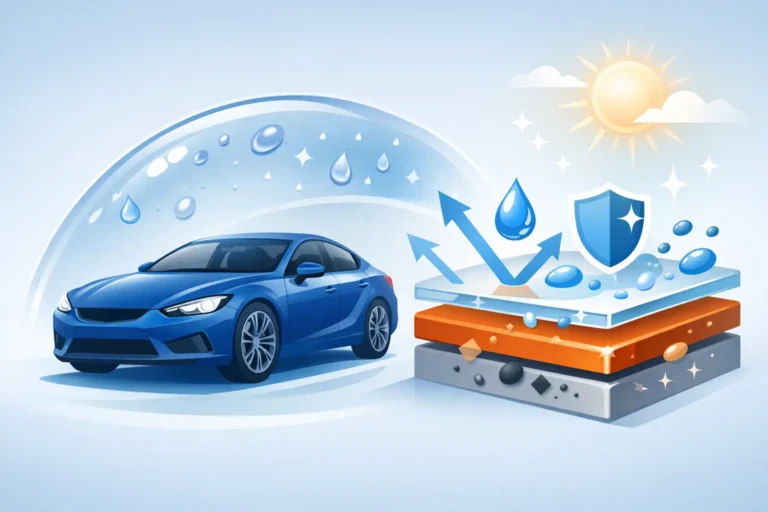
The Ultimate Shield Ceramic Coatings
If wax is a raincoat and a sealant is a winter jacket, then a ceramic coating is a permanent suit of armor. This is, without a doubt, the highest tier of paint protection you can get. Unlike waxes and sealants that just sit on top of the paint, a ceramic coating forms a chemical bond with the clear coat, creating a semi-permanent, incredibly hard layer of protection.
This isn't just a better wax; it's a completely different technology.
A professionally installed ceramic coating offers durability that other products can't even come close to. We’re talking about multi-year protection from just one application. Its hardness helps resist minor scratches and swirl marks from washing, and its extreme water-beading (hydrophobic) properties make the car ridiculously easy to clean.
More importantly, it provides the best defense against the things that fade paint:
- UV Radiation: It acts like a powerful, long-term sunscreen for your clear coat.
- Chemical Stains: It’s highly resistant to etching from acidic bird droppings and bug guts.
- Oxidation: It completely seals the paint off from the environmental exposure that causes it to dull.
The data is compelling; ceramic coatings applied after a restoration can extend the life of your paint by 5-10 years and have been shown to reduce the recurrence of fading by 92% in accelerated UV tests. For car owners in Lincoln, NE, facing over 2,200+ hours of sunshine annually, this is a game-changer. You can discover more insights about these findings on CeramicPro.com.
For a deeper look at whether this level of protection is right for your car and budget, we break down all the details in our guide that asks, "Is Ceramic Coating Worth It?". Choosing the right protection is the only way to make sure your hard work restoring faded paint actually lasts.
You've learned the whole process: the wash, the decontamination, the polishing, and the protection. Now for the million-dollar question: are you really the right person for this job? Taking on paint restoration is incredibly rewarding, but it’s a serious commitment of time, money, and patience. You have to be honest with yourself about your confidence and resources before you start.
Sometimes, the smartest thing you can do for your car is to pick up the phone instead of the polisher. Realizing when to call a professional isn't giving up; it's a strategic move to guarantee a perfect result without the risk.
Evaluating Your Time and Tools
Let’s be realistic. A proper multi-step paint correction isn’t a quick Saturday morning chore. For a beginner, you should plan on dedicating a full weekend—that’s 10 to 20 hours at a minimum. If you're a busy parent juggling soccer practice and groceries or a professional whose weekends are sacred, that time commitment alone can be a deal-breaker.
Then there’s the gear. A quality dual-action polisher, a variety of pads, different compounds and polishes, an arsenal of microfiber towels, and all the prep chemicals can easily set you back over $300. That’s a steep price for tools you might only use once.
- Time vs. Money: Do you genuinely have a free weekend to dedicate to this, or is your time more valuable spent elsewhere?
- Tool Investment: Are you ready to drop hundreds on quality equipment, or would that money be better invested in a professional service?
- Storage and Workspace: Do you have a garage or shaded area where you can work without interruption, safe from direct sun and airborne dirt?
If you hesitated on any of those, it’s a strong sign that calling a pro is likely the most efficient and cost-effective route for you.
When the Risk Outweighs the Reward
Beyond just time and tools, the biggest decider is the actual condition of your paint. A DIY approach is fantastic for light-to-moderate oxidation and dullness, but some problems are truly best left to an experienced hand.
The most critical red flag is clear coat failure. If you see blotchy white patches, peeling, or areas where the paint looks like it's flaking off, stop. No amount of polishing can fix it. The clear coat is gone, and trying to buff it will only burn through and damage the color underneath. At that point, a professional needs to see if a repaint is the only option.
Professionals bring a lot more than just experience; they bring better equipment. At GP Mobile Car Wash & Detail, we use paint depth gauges to measure how much clear coat you have before we even touch the paint. This lets us be aggressive enough to remove the fading but safe enough to preserve what’s left. We also have access to professional-grade ceramic coatings not sold to the public, offering years of protection that DIY kits simply can't match.
The GP Mobile Advantage in Lincoln
Choosing a professional detailer is about more than just getting the work done. It’s about convenience, peace of mind, and a result that turns heads. For car owners in Lincoln, NE, and the surrounding areas, we make that decision easy.
Our mobile service means we come right to your home or office, performing the entire restoration in your driveway. You don’t lose your car for a day or have to arrange for rides. Our technicians are insured, highly experienced, and truly passionate about their craft. They know exactly how to handle Nebraska’s specific environmental challenges, from road salt damage to the intense summer sun.
If your paint fade is severe, if you demand a flawless finish, or if you simply value your time, we are here to help. Contacting the team at GP Mobile Car Wash & Detail for a personalized consultation is the first step toward restoring your car’s shine the right way—safely, efficiently, and with guaranteed results.
Common Questions About Restoring Faded Paint
Even with a solid plan, you probably still have a few questions rolling around in your head before you commit to a full-on paint restoration project. Getting these common concerns sorted out is the final step before you can confidently decide whether to tackle it yourself or call in a pro.
One of the first things people ask us is if all faded paint can actually be saved. I wish I could say yes, but the honest answer is no. Our restoration methods work miracles on surface oxidation, but they are completely ineffective against total clear coat failure.
When Is Paint Too Far Gone?
So, how do you spot the point of no return? You need to look for specific signs that the clear coat—the protective top layer of your paint—is gone for good, not just oxidized.
- Peeling or Flaking: If you can see the clear coat physically lifting, chipping, or flaking off like old varnish, that's a dead giveaway. Polishing will just rip more of it off.
- Big White Patches: A uniform, chalky haze is usually fixable. But if you see blotchy, distinct white patches that look like a bad sunburn on your paint, the clear coat has failed in those areas.
If your car has these symptoms, no amount of buffing or polishing will fix it. At that stage, the only real solution is a trip to a body shop to have the panels repainted. Trying to polish failed clear coat is a surefire way to burn right through to the color underneath, turning a cosmetic issue into a much more expensive problem.
What Does Professional Paint Restoration Cost?
The next logical question is always about the cost. A professional paint correction is an investment, and the price can swing quite a bit based on a few key things. On average, you can expect a professional job to run anywhere from $300 to over $1,000.
What causes that big price range?
- Vehicle Size: It’s simple math. A big SUV or truck has a lot more paint to correct than a small coupe.
- Severity of Fading: Light oxidation might only need a one-step polish, which is on the lower end of the price scale. Deep, chalky fading that requires heavy compounding and multiple polishing stages takes a lot more time and skill.
- Your Choice of Protection: The final price also reflects how you choose to protect that new shine. A high-quality paint sealant is a great option, but it will be less expensive than a professional-grade ceramic coating designed to last for years.
A true professional will always inspect your vehicle in person before giving you a quote. This ensures you’re only paying for the work your car actually needs, not a flat rate that might not fit your situation.
Keeping Your Car Shiny After Restoration
Once all the hard work is done, you have to protect your investment. Letting that beautiful, glossy finish get dull again would be a real shame, and thankfully, a simple maintenance routine is all it takes.
The number one rule is to wash your car properly every week or two. Use the two-bucket method and a pH-neutral car soap to avoid putting new scratches and swirls right back into the paint you just perfected.
Also, we can't stress this enough: stay away from automatic car washes with spinning brushes. Those abrasive bristles are notorious for scratching fresh polishes and can even wear down a durable ceramic coating over time. If you’re in a bind, a touchless automatic wash is a much safer bet.
When you want a guaranteed, head-turning finish without the guesswork and time commitment, GP Mobile Car Wash & Detail is here to help. We bring our expertise and professional-grade equipment right to your doorstep. Book your appointment online today and let us bring that showroom shine back to your car.