You walk out to the truck, toss a bag in the bed, and spot it right away. A fresh gouge. Maybe it came from a steel toolbox corner, a landscaping block, or a skid that shifted harder than it should have. Either way, the part that was supposed to be the tough layer now looks chewed up.
That’s the moment most owners ask the same question. Is this cosmetic, or did I just start a bigger problem?
The good news is that a lot of spray in bed liner repair jobs are absolutely fixable if you stay honest about the damage, use the right prep, and don’t rush the cure. The bad news is that bed liner repairs are easy to botch when people treat them like a quick paint touch-up. They’re not. Adhesion, texture, edge blending, and safety all matter.
Your Truck Bed Liner's First Line of Defense
A spray-in liner earns its keep when the truck gets used like a truck. In Lincoln, that might mean hauling landscaping stone in spring, lumber on weekends, or muddy gear after a hunting trip. So if your liner has a scar, that doesn’t mean it failed. It usually means it did its job and took the hit first.
That’s worth preserving. The global spray-on bed liner market was valued at approximately USD 823 million in 2025 and is projected to reach USD 1,252 million by 2034, with the aftermarket automotive segment accounting for 60% of all applications, according to Intel Market Research on spray-on bed liners. Truck owners keep choosing these liners because they hold up well against abrasion and hard use.
Why damage happens even on a tough liner
Most damage starts in predictable places:
- Front bed wall: cargo shifts forward under braking
- Wheel well edges: sharp tools get leaned or dropped there
- Tailgate opening: loading angle gets sloppy when you're tired
- Corners and seams: repeated impacts chew on the same spot
A gouge doesn’t always mean the whole liner is failing. Sometimes it’s just a localized wound in an otherwise solid coating. That’s the sweet spot for a repair.
Practical rule: If the surrounding liner is still tight, bonded, and not peeling, a repair usually makes more sense than a full recoat.
A lot of owners also confuse bed liner protection with underbody protection. They’re related, but not the same job. If you’re trying to protect the truck beyond the bed itself, frame undercoating services solve a different problem entirely.
Why repair is worth the effort
A bed liner isn’t just there to make the truck look rugged. It’s there to keep abuse off the metal underneath and keep the bed usable. A clean repair helps you maintain grip, coverage, and appearance without turning one scar into a larger weak spot.
The honest view is simple. Small damage is usually manageable. Large failure, exposed metal, or widespread peeling is where DIY confidence starts getting expensive.
What You're Up Against Damage Diagnosis and Tool Prep
Before you buy a kit or crack open a can, figure out what kind of damage you have. Bed liner repair starts with diagnosis, not application.
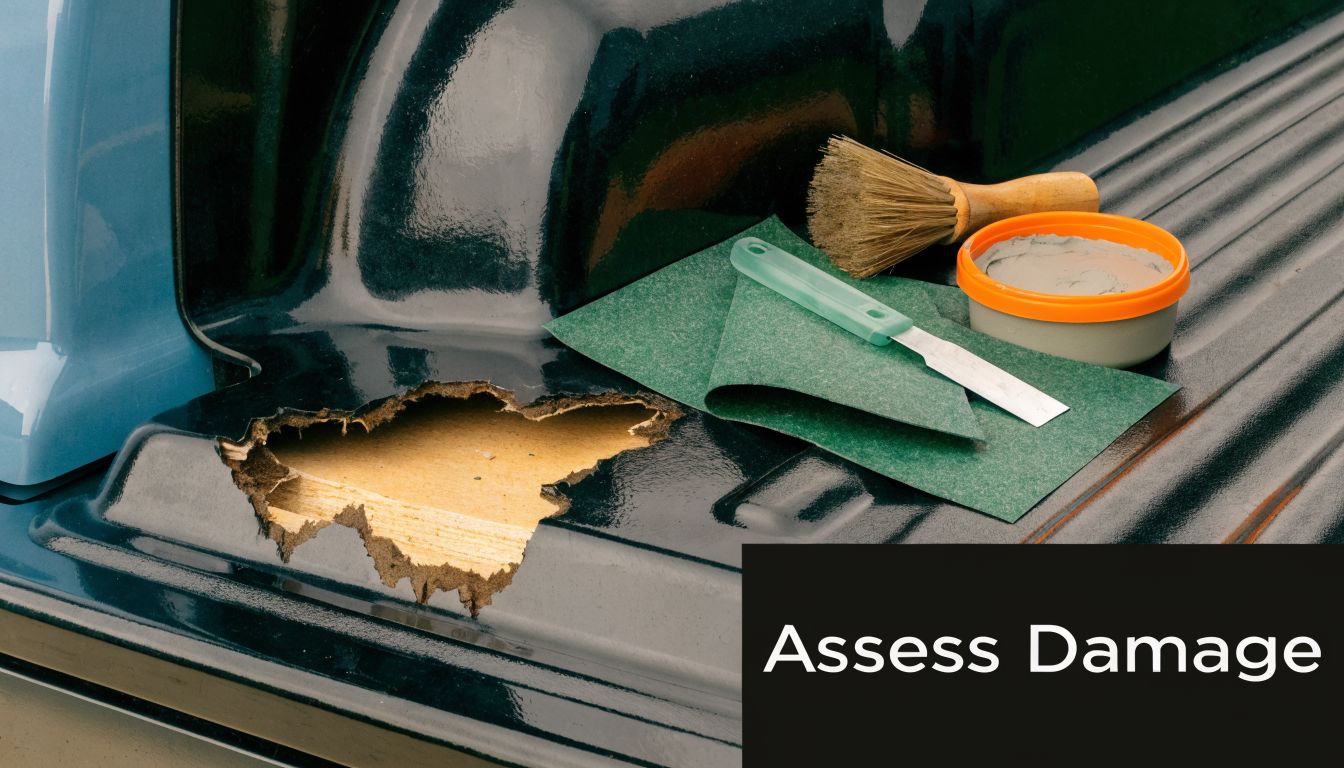
Three damage types that matter
The first category is surface wear. That looks bad but usually stays shallow. Think scrapes, flattened texture, or light abrasion where the liner is still intact.
The second category is a real gouge. You can catch a fingernail in it, and the texture is torn or chunked out, but you’re not yet seeing bare metal. Most DIY spray in bed liner repair jobs address this kind of damage.
The third category is structural damage to the coating. That means a cut, tear, exposed metal, edge lifting, or sections that are peeling away from the bed. Once metal is involved, the repair gets less forgiving because adhesion and corrosion control become part of the job.
Quick inspection checklist
Use this before you commit:
- Check the edges: Press around the damaged area with your thumb. If the liner lifts, flexes, or sounds hollow, the problem may extend farther than the visible gouge.
- Look for rust staining: Any orange-brown discoloration around a cut suggests the coating barrier has been breached.
- Feel the texture transition: If the surrounding liner is solid and consistent, a localized patch has a better chance of blending.
- Inspect corners and seams: Damage near bed seams can be harder to feather and hide.
If the damage is wider than it first looked once you start probing the edges, stop calling it a touch-up. It’s now a coating repair.
Your tool bench should match the damage
For a small gouge repair, keep the setup simple and controlled. You’ll want a utility knife or flat blade screwdriver to remove loose material, masking tape, paper shop towels, lint-free cloths, prep solvent such as lacquer thinner, and a textured pad for imprinting the finish. A wood block helps apply even pressure over the pad.
For larger areas, surface prep gets more aggressive. That can include 40-grit sandpaper, a wire brush, plastic sheeting for masking, acetone for degreasing, and primer if bare metal is exposed. At that point, you’re moving out of basic touch-up territory.
Safety is not optional
This is the part DIYers skip because it feels annoying until it isn’t. Worker safety data highlights the risks of exposure to methylene diphenyl diisocyanate (MDI) in spray-on liner products. Airborne concentrations can exceed the NIOSH Recommended Exposure Limit, making PPE like a supplied-air respirator essential for any DIY or professional repair to prevent respiratory disease, as detailed by the CDC and NIOSH guidance on spray-on bed liner hazards.
If you can smell the material, that does not mean you’re getting a safe amount. It means you’re exposed.
Use at minimum:
- Respiratory protection: A supplied-air respirator is the safe benchmark noted in the CDC guidance.
- Gloves: Chemical-resistant gloves, not thin disposable food-service gloves.
- Eye protection: Goggles that seal better than casual safety glasses.
- Ventilation: Open air alone isn’t the same as controlled airflow.
The honest go or no-go call
If you’re dealing with a small, isolated gouge and you can prep it cleanly, DIY can make sense. If the damage has spread under the surface, if metal is exposed, or if you can’t control the fumes and overspray safely, it’s smarter to stop before you waste material and make the repair harder for the next person.
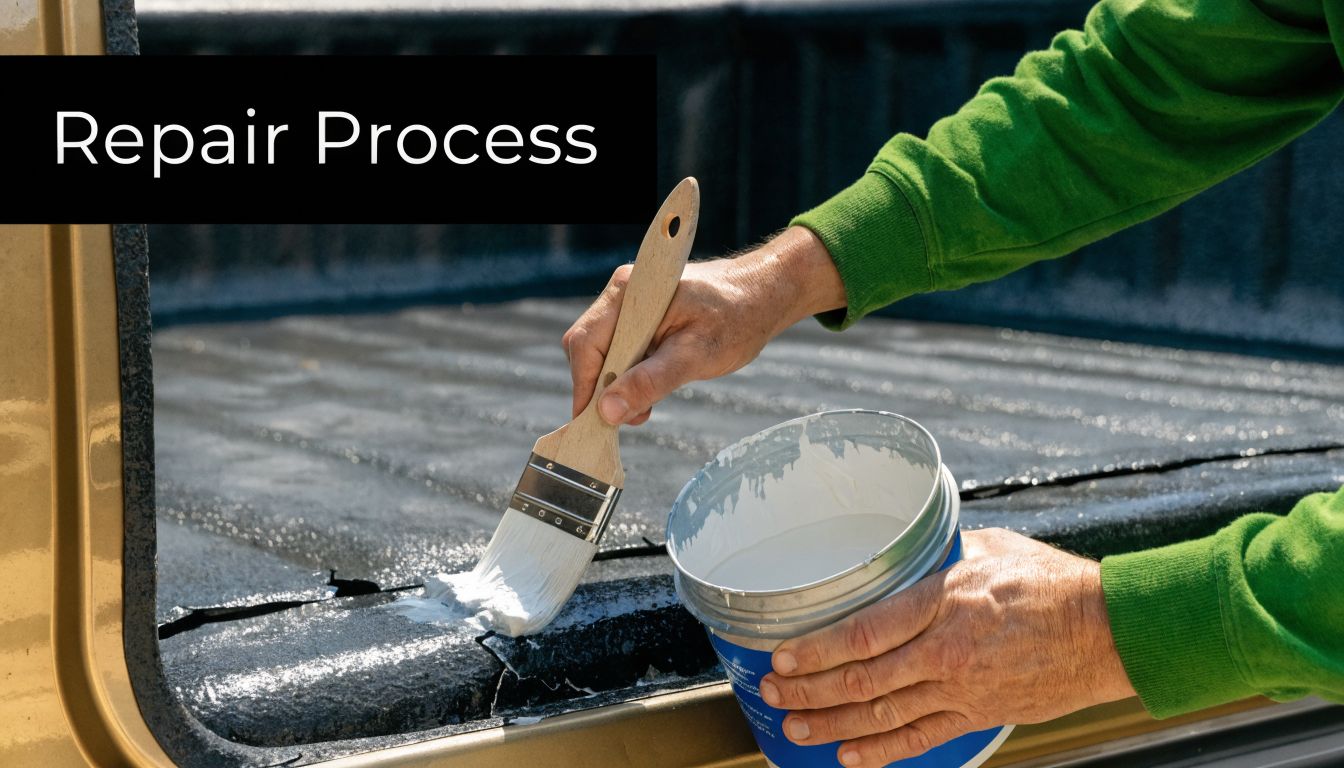
From Damaged to Durable A Step-by-Step Repair Guide
The best small repair jobs don’t look rushed. They look boring while you do them. That’s usually a good sign.
Prep the damage zone first
Start by removing anything loose. A utility knife or flat blade screwdriver works well for lifting out weak material that won’t hold a repair. Don’t leave ragged edges and hope the new product will glue them down.
Then bevel the perimeter of the damaged spot. Feathering the edge gives the repair material something to bond into instead of creating a hard ridge. This matters more than it might seem.
Clean the area with a prep solvent such as lacquer thinner on a lint-free cloth. Then let it dry fully. If there’s dust, residue, or grease left in the gouge, the patch may look fine at first and still fail later.
Mask like you care about the result
Set a large paper shop towel next to the repair as a spray-off target. This is one of those factory-style habits that sounds fussy but helps a lot. It lets you start the material flow off the actual repair instead of blasting a blob into the center of the damaged spot.
Mask the surrounding area so your repair stays contained. Sloppy edges are one of the biggest tells of a home repair.
Small repair sequence that works
For minor gouges, follow this order:
- Clean out the damage and bevel the edge.
- Wipe with prep solvent and dry the area.
- Place a paper towel nearby for your initial spray-off.
- Mask the surrounding liner so only the repair zone stays exposed.
- Test the spray pattern on the towel first.
- Apply a slow, continuous bead from the towel into the repair, working from the outer edge inward in a spiral.
- Slightly overfill the gouge rather than leaving it low.
- Press a textured pad onto the repair with firm, even pressure.
- Hold that pressure for at least 2 minutes.
- Release the pad carefully and clean any dried residue if needed.
- After 10 minutes, apply bed liner conditioner to help blend the sheen with older surrounding material.
According to GM factory repair specifications published through NHTSA, success rates for small repairs exceed 95% when the gouge is slightly overfilled and a textured pad is applied with firm, even pressure for at least 2 minutes.
Slight overfill is safer than underfill. Low spots collect abuse first, and they always stand out once the repair cures.
Texture is where most DIY jobs go sideways
A lot of people think color match is the hard part. It isn’t. Texture match is harder. A repair with the wrong texture catches light differently, and your eye goes right to it every time you open the tailgate.
The pad step matters because it compresses and shapes the fresh material before it skins over. Use firm, even pressure. A small wood block helps spread pressure across the pad so you don’t leave finger dents or odd edges.
If your liner is older and faded, the patch can still look newer even when the texture is right. That’s where conditioner helps soften the contrast.
For larger damaged areas
Once the damage gets bigger, the process changes. You’re no longer just filling a gouge. You’re rebuilding a bonded coating system.
Large-area polyurea repair methods involve abrasion, degreasing, scuffing beyond the damaged area, primer on any bare metal, and building the material in controlled passes rather than one heavy blob. If you want to see what that level of repair process looks like in practice, this walkthrough is a useful reference:
What to expect when you're done
A good DIY repair usually lands in one of two categories. It either blends well enough to go unnoticed, or it looks like a clean, durable patch that’s visible only if you know where to look.
That’s a win. Chasing invisible perfection is where many owners overwork the area and make it worse.
Curing and Finishing Your Repair and Avoiding Common Pitfalls
Fresh material lying flat in the bed doesn’t mean the repair is ready for work. That’s where people get impatient and ruin a decent patch.
A bed liner product can feel dry on top before it has built full strength underneath. If you toss hardware, lumber, or scrap into the bed too early, you can dent the repair, distort the texture, or pull the surface before it settles.
Curing the right way
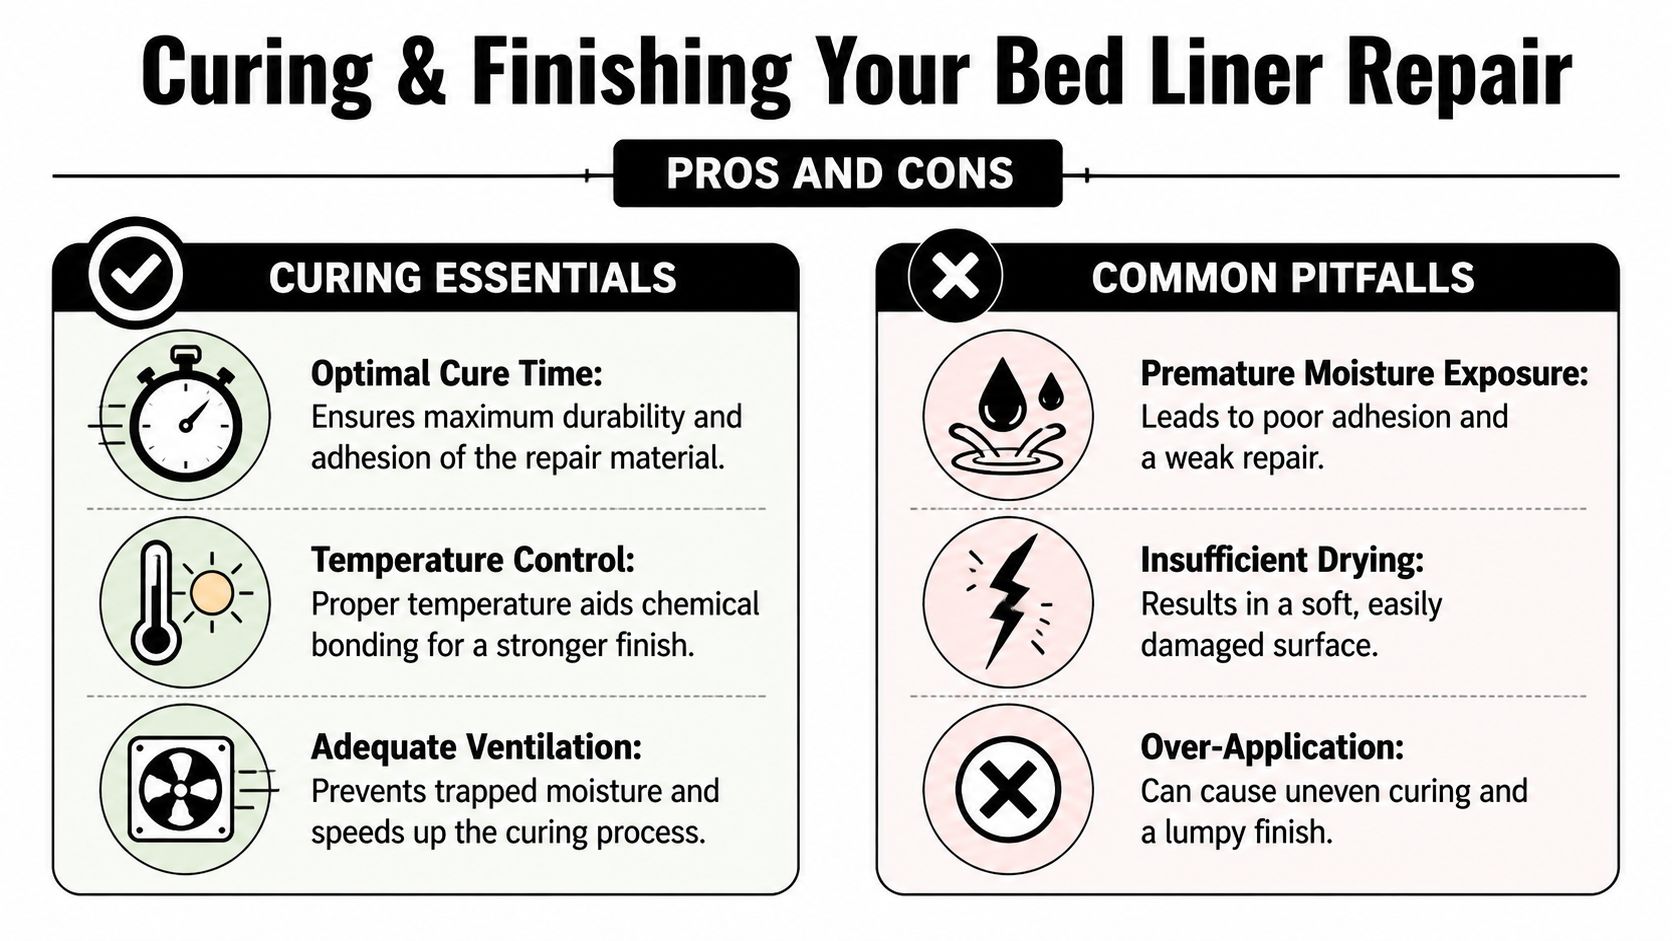
Think in stages, not in one finish line. The surface may set first, but the deeper bond needs more time. Temperature matters. Airflow matters. The material also behaves differently in a cold garage than it does on a warm Nebraska afternoon.
If your repair system includes a conditioner or finish treatment, use it only when the instructions call for it. Don’t start dressing the patch while it’s still unstable.
A careful finish process often looks like this:
- Leave it alone early: Don’t poke it every few minutes to “check” it.
- Keep the area clean: Dust, grass, and shop debris love fresh textured coatings.
- Address only obvious high spots: If there’s a raised edge after cure, level it gently. Don’t attack the whole repair.
- Blend sheen last: A bed liner conditioner can help the patched spot sit better beside older material. If you also care about the rest of the truck’s protection and finish, ceramic coating options serve a different purpose on painted surfaces.
A repair that cures fully but stays slightly visible is better than a repair that looked perfect for one day and started peeling a week later.
What not to do
The honest DIY guide is of utmost importance. Most failed repairs don’t fail because the owner lacked effort. They fail because the owner rushed one ugly little step they thought didn’t matter.
Common mistakes that cause bad results
- Skipping edge prep: If you don’t bevel or feather the damage, the patch can sit like a cap on top instead of bonding into the surrounding liner.
- Cleaning too casually: Dust, oil, and old grime break adhesion faster than people expect.
- Applying too much at once: Thick, uncontrolled application can leave a lumpy repair and uneven texture.
- Touching cure time too soon: If you load the bed early, the repair can stay marked, soft, or tacky.
- Ignoring the surrounding texture: A patch can be structurally fine and still look amateur because the texture doesn’t match.
- Working in poor ventilation: Bad air control isn’t just a comfort issue. It’s a safety issue.
Challenge the usual DIY shortcut
A lot of owners assume the goal is to get the product on the truck as fast as possible. It isn’t. The actual goal is to make the repaired area act like the rest of the liner.
That means prep, controlled application, pressure, and patience. The glamorous part of bed liner repair is about thirty seconds long. The rest is discipline.
Knowing Your Limits When to Hire a Professional
Some truck owners can absolutely handle a basic gouge repair. Some should never start one. The difference usually comes down to damage size, safety setup, and expectations.
If your bed has one isolated wound in solid surrounding liner, DIY is a reasonable project. If the bed has widespread peeling, exposed metal, torn sections, or damage that crosses seams and corners, the repair gets more technical fast.
Red flags that push this out of DIY range
These are the points where I’d stop treating it like a weekend fix:
- Bare metal is exposed
- The liner is peeling beyond the visible damage
- You have more than one failed area
- The bed has rust starting under the coating
- You need a broad texture match across a large section
- You don’t have safe respiratory protection or proper spray control
At that stage, the material isn’t the whole story anymore. Surface prep, primer choice, layer build, and blending all matter.
What pros do differently
For extensive damage, professionals use two-component polyurea systems applied with low-pressure spray equipment. The process includes thorough abrasion, primer on bare metal, and building 5 to 6 passes to achieve a verified thickness of 100 to 133 mils, as shown in this large-area polyurea bed liner repair reference video.
That’s different from squeezing filler into a gouge and stamping texture into it. It’s a system repair.
The larger the damaged area, the less forgiving the repair becomes. Big repairs punish weak prep.
DIY versus pro in plain terms
| Factor | DIY Repair | Professional Service (e.g., GP Mobile) |
|---|---|---|
| Scope | Best for isolated gouges and minor localized damage | Better for large damage, exposed metal, or failing liner sections |
| Equipment | Basic hand tools, masking supplies, small repair materials | Dedicated spray equipment, prep systems, and controlled application |
| Safety | Depends on your PPE and ventilation setup | Better suited for hazardous material handling and application control |
| Time | Lower cash outlay, higher personal labor and trial-and-error risk | Less owner effort, usually more predictable workflow |
| Finish quality | Can be solid on small repairs, harder to texture-match perfectly | Stronger chance of consistent texture and cleaner blend |
| Risk | Higher chance of rework if prep or cure is off | Lower risk of amateur mistakes on complex jobs |
If convenience matters too, working with a mobile detailer in Lincoln can make the logistics easier than dropping the truck off somewhere across town and rearranging your whole day.
The honest choice
The smart move isn’t always the cheapest one up front. It’s the one that protects the truck without turning one repair into a bigger correction later.
DIY makes sense when the damage is contained and you’re willing to do the slow parts right. Professional repair makes sense when the bed needs system-level work, not just a patch.
Your Bed Liner Repair Questions Answered
Can a faded bed liner be restored, or does it need a full recoat
If the liner is faded but still bonded well, you may be able to improve appearance with cleaning and a surface treatment. If the coating is chalking, peeling, or breaking down, appearance products won’t fix the underlying problem.
How long should I wait before loading cargo onto a repair
Wait until the repair has fully cured, not just dried on the surface. Small repairs may feel set early, but heavy cargo can still mark or weaken them if you rush it. When in doubt, give it more time than you think you need.
What’s the difference between polyurethane and polyurea in repair work
Both are used in bed liner systems. For practical DIY purposes, what matters most is whether the repair material is compatible with the existing liner and whether you can apply it safely and correctly. On larger jobs, pros often use two-component polyurea systems because they’re built for more involved coating repair work.
Can I paint over a spray-in bed liner
You can coat over some liners, but success depends on prep and compatibility. A dirty or slick liner won’t hold paint well. If your goal is appearance only, be careful. A cosmetic layer that doesn’t bond well can fail faster than the original problem.
Is a visible repair a failed repair
Not necessarily. A failed repair peels, lifts, stays soft, or breaks down under use. A visible repair that stays bonded and protects the bed has done its job. Most truck owners can live with a small visible patch a lot easier than they can live with spreading damage.
What’s the biggest DIY mistake
Rushing. Most bad outcomes trace back to poor cleaning, weak edge prep, bad safety habits, or loading the bed before the repair has settled.
If your truck bed liner damage looks beyond a simple touch-up, GP Mobile Car Wash & Detail can help you protect the rest of your vehicle with convenient mobile service or shop care in Lincoln, Nebraska. From detailed cleaning to exterior protection services, their team gives truck owners a practical way to keep a hard-working vehicle looking sharp and holding value.