You notice it on a dark road first. The headlights are on, but the pavement ahead still looks dull, the beam looks weak, and every reflective sign seems to light up later than it used to. Then you look at the front of the car the next morning and see it clearly. The lenses are cloudy, yellowed, or milky.
That's usually when people start searching for a headlight restoration kit for sale. It makes sense. Replacing headlight assemblies can be expensive, and a kit promises a driveway fix with basic tools and a little effort. The appeal is real.
The category is also far from obscure. The global headlight restoration kits market was valued at $450 million in 2024 and is projected to reach $820 million by 2033, a projected 6.9% CAGR, with North America representing about 36% of demand according to MarketIntelo's headlight restoration kits market report. That tells you two things. First, hazy headlights are a common problem. Second, a lot of people would rather try restoration before they pay for replacement.
Your Guide to Brighter Safer Headlights
Most drivers who shop for a kit aren't chasing showroom looks first. They're reacting to a practical problem. Night driving feels harder, the front end of the car looks older than it is, and they want to know whether a kit will fix the issue or just make the lens look better for a week.
That's a fair question. Some kits can make a major visual difference. Some can also improve usable light output. But the part most buyers miss is durability. Day-one clarity is easy to advertise. The harder question is what the lens looks like after heat, rain, car washes, and months of UV exposure.
Why this search is so common
The demand numbers tell the story. This isn't some niche detailing product that only enthusiasts know about. It's a mainstream maintenance category with real consumer demand, and buyers often choose all-in-one solutions over piecing together sanding discs, polish, and protectant separately.
If you're trying to decide whether to buy a kit or book a service, it helps to understand why restoration matters in the first place. This short piece on why headlight restoration matters for safety and aesthetics frames the issue well. Faded headlights affect how the car looks, but the more important point is how they affect what you can see.
Hazy headlights are rarely just a cosmetic annoyance. They change how light passes through the lens, and that changes what the driver sees at night.
A good buying decision starts with that mindset. You're not just shopping for shine. You're shopping for visibility, durability, and a fix that makes sense for the condition of your specific headlights.
Why Headlights Turn Yellow and How Kits Fix It
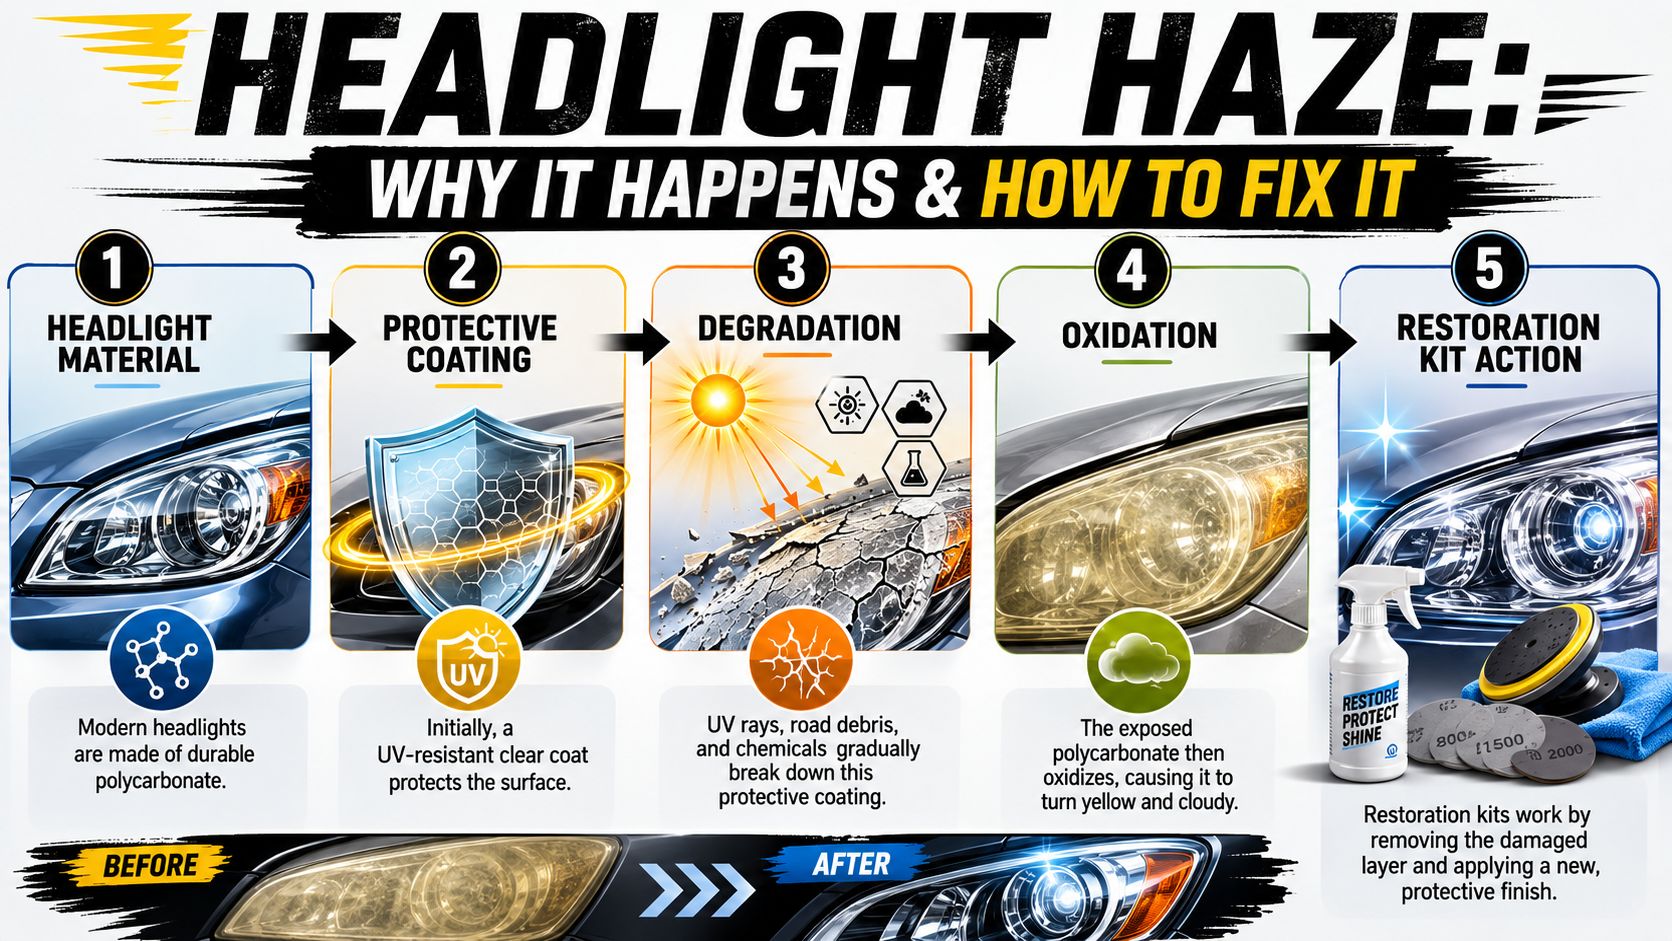
Modern headlight lenses are usually made from polycarbonate. It's durable and impact-resistant, which is why manufacturers use it, but it needs protection from the sun. Once that protective surface breaks down, the lens starts to oxidize. That's what creates the cloudy or yellow film you see.
Think of it as a damaged outer skin on the plastic. The surface gets rough, light scatters instead of passing cleanly through, and the lens stops doing its job well.
What's actually happening to the lens
UV exposure is the main culprit. In weathered lenses, that degradation can increase haze transmission by up to 40%. That number matters because it shows this isn't just surface discoloration. It's a loss of optical clarity.
Once the lens reaches that point, wiping it with a cleaner won't solve much. The damaged layer has to be removed.
The three parts of a real restoration
A proper kit works in three stages:
Sanding
The abrasive step removes the oxidized outer layer. Good kits use a progressive grit sequence, commonly 800, 1200, and 2000 grit, so each pass removes the scratch pattern from the previous step.Polishing
After sanding, the lens looks uniformly dull. That's normal. Polishing refines the surface and restores clarity.Sealing
This is the make-or-break step. A UV-blocking polymer sealant protects the freshly exposed plastic.
Practical rule: Sanding fixes the damage you can see. Sealant determines how long the repair lasts.
Where DIY jobs usually fail
The most common mistake isn't sanding too much. It's stopping too soon or skipping protection. If you restore the lens and don't apply a proper UV-blocking top coat, the polycarbonate is exposed again and can re-oxidize in as little as 3 to 6 months.
Wet sanding also matters. Keeping the abrasive and lens wet helps prevent excess heat, and that reduces the chance of micro-fractures or warping. This is one reason rushed DIY jobs often turn out uneven. The process is simple in concept, but it's still surface refinishing, not a wipe-on shortcut.
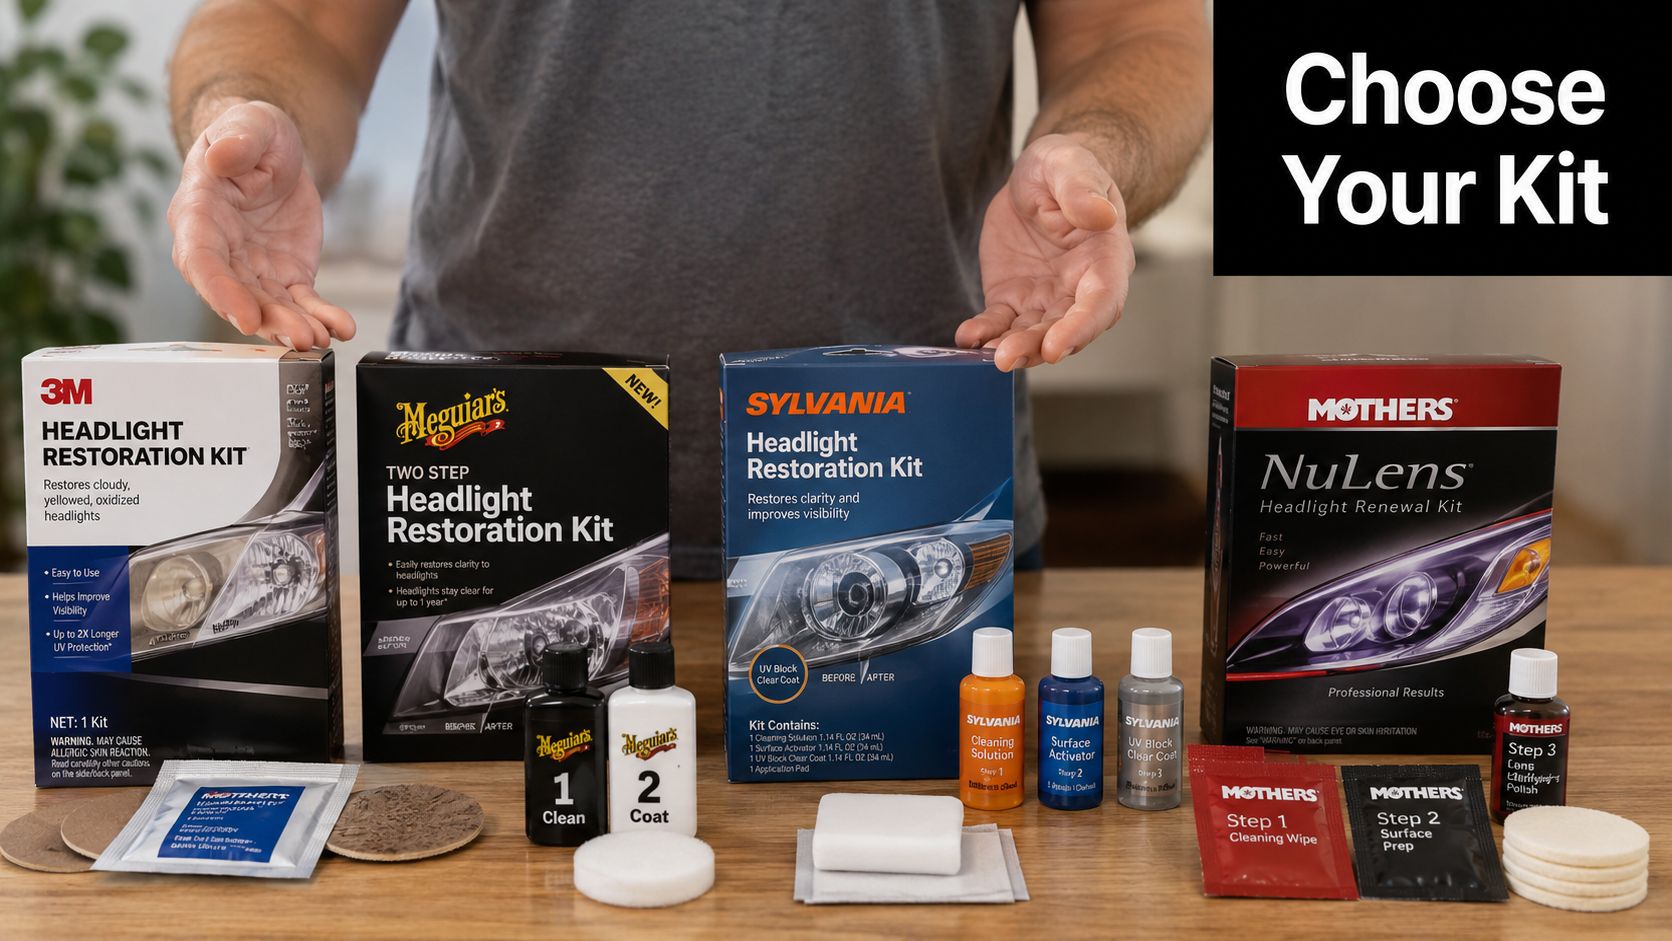
How to Choose the Right Headlight Restoration Kit
You finish the job on a Saturday, the lenses look clear, and by the end of the season the haze is creeping back. That usually comes down to kit selection, not just technique. If you are comparing a headlight restoration kit for sale, judge it by how long the repair is likely to hold up.
A decent kit can improve clarity. A well-built kit gives you a better shot at keeping that clarity through sun, rain, and regular washing. That distinction matters more than the box claims.
Buy for durability first
The longest-lasting DIY results usually come from kits that treat UV protection as a full step, not a small add-on wipe. Freshly sanded polycarbonate is vulnerable. If the coating is weak, thin, or poorly matched to the process, the lens often looks good right away and drops off faster than owners expect.
Check whether the kit includes a dedicated UV sealant or clear coat with clear cure instructions. If the product is vague about the protective step, assume the lifespan will be vague too.
Check what the kit asks you to do
Some kits are built for speed. Some are built for better correction. Those are not always the same thing.
A simple wipe-on kit may help very light oxidation, but it usually will not hold up well on headlights with deeper yellowing or patchy damage. For that, look for a kit with:
- Progressive sanding steps so you can level the damaged surface evenly
- A true polishing stage to refine the sanding marks
- A separate protectant designed for UV exposure
- Clear instructions on surface prep and curing time
- Enough material for both headlights, especially if the lenses are heavily weathered
Drill attachments can cut labor, but they also make it easier to create uneven spots or edge marks if your pressure and movement are inconsistent. Hand-sanding takes longer, yet many first-time users get a more controlled result that way.
Match the kit to the condition of the lens
Buyers frequently waste money. A mild kit used on badly oxidized headlights often leaves behind cloudy patches. An aggressive kit used on lightly faded lenses can remove more material than necessary and still depend on the same weak top coat as a cheaper option.
Use a simple filter:
- Light haze: a lighter-duty kit may be enough
- Moderate yellowing: choose a full sand, polish, and seal system
- Heavy oxidation, internal haze, or cracking: a DIY kit may produce only temporary cosmetic improvement
If you want a realistic benchmark for how different approaches hold up over time, these headlight restoration service reviews are more useful than product marketing copy.
Do not buy a kit for the wrong problem
Dim headlights are not always a lens problem. If the plastic looks fairly clear but nighttime visibility is still poor, the issue may be bulb output, internal reflector wear, or electrical performance. In that case, a restoration kit will not fix the root cause.
That is the practical trade-off with DIY kits. The better ones can restore clarity for a while, especially on moderately damaged lenses. They still depend on careful prep, proper coating application, and realistic expectations about lifespan. If your priority is the longest-lasting result, the kit matters, but the service level matters more.
DIY Kit vs Professional Restoration Service
DIY restoration appeals for a reason. It's accessible, it can work, and many owners would rather spend an hour in the driveway than schedule another service appointment. But the trade-off isn't just price. It's also risk, finish quality, and how often you may have to do the job again.
The professional process is less forgiving because it's more exact. Detailers follow a strict wet-sand-and-polish workflow, and uniform abrasion often depends on maintaining roughly 15 to 20 psi with the tool. Skip a grit, sand unevenly, or apply the final sealant in poor conditions, and the result usually fails early.
Where the difference shows up
DIY kits are usually good for owners who have moderate oxidation, patience, and realistic expectations. They make less sense when the lens is badly weathered, the vehicle matters to you cosmetically, or you don't want to revisit the job after a short period.
Professional restoration usually produces a more uniform finish because the technician controls pressure, grit progression, polishing, and sealant application more consistently. It also reduces the chance of edge damage, uneven haze removal, and patchy coating failure.
The biggest gap between DIY and professional work usually isn't the first day. It's how the lens looks months later.
DIY Kit vs Professional Headlight Restoration
| Factor | DIY Restoration Kit | Professional Service (e.g., GP Mobile) |
|---|---|---|
| Upfront cost | Lower initial cost | Higher initial cost |
| Time required | You handle prep, sanding, polishing, cleanup, and curing | You hand the vehicle off and avoid the labor |
| Skill needed | Moderate. Easy to make visible mistakes | Technician-controlled process |
| Risk to paint and trim | Higher if masking is poor or sanding slips | Lower when handled by trained detailers |
| Finish consistency | Varies by user technique and kit quality | Usually more even and refined |
| Durability | Depends heavily on kit sealant and application quality | Typically more durable because of process control and stronger protection systems |
| Best for | Budget-focused owners comfortable with hands-on work | Owners who want less risk and longer-lasting results |
When professional service makes more sense
A professional service is the better call when:
- The lenses are heavily oxidized: Deep weathering often needs more controlled correction.
- You want fewer do-overs: Durability matters more than the lowest upfront cost.
- The car matters cosmetically: Uneven sanding is hard to ignore on a well-kept vehicle.
- You don't want to gamble on technique: Pressure, grit sequence, and curing conditions all matter.
If you want to see how owners talk about finished results and service outcomes, these headlight restoration reviews from GP Mobile offer useful context. Headlight restoration is one of those services where consistency matters as much as the immediate visual change.
For many drivers, the calculation is simple. A kit may be cheaper today. A professional restoration often costs less frustration and less repeat work over time.
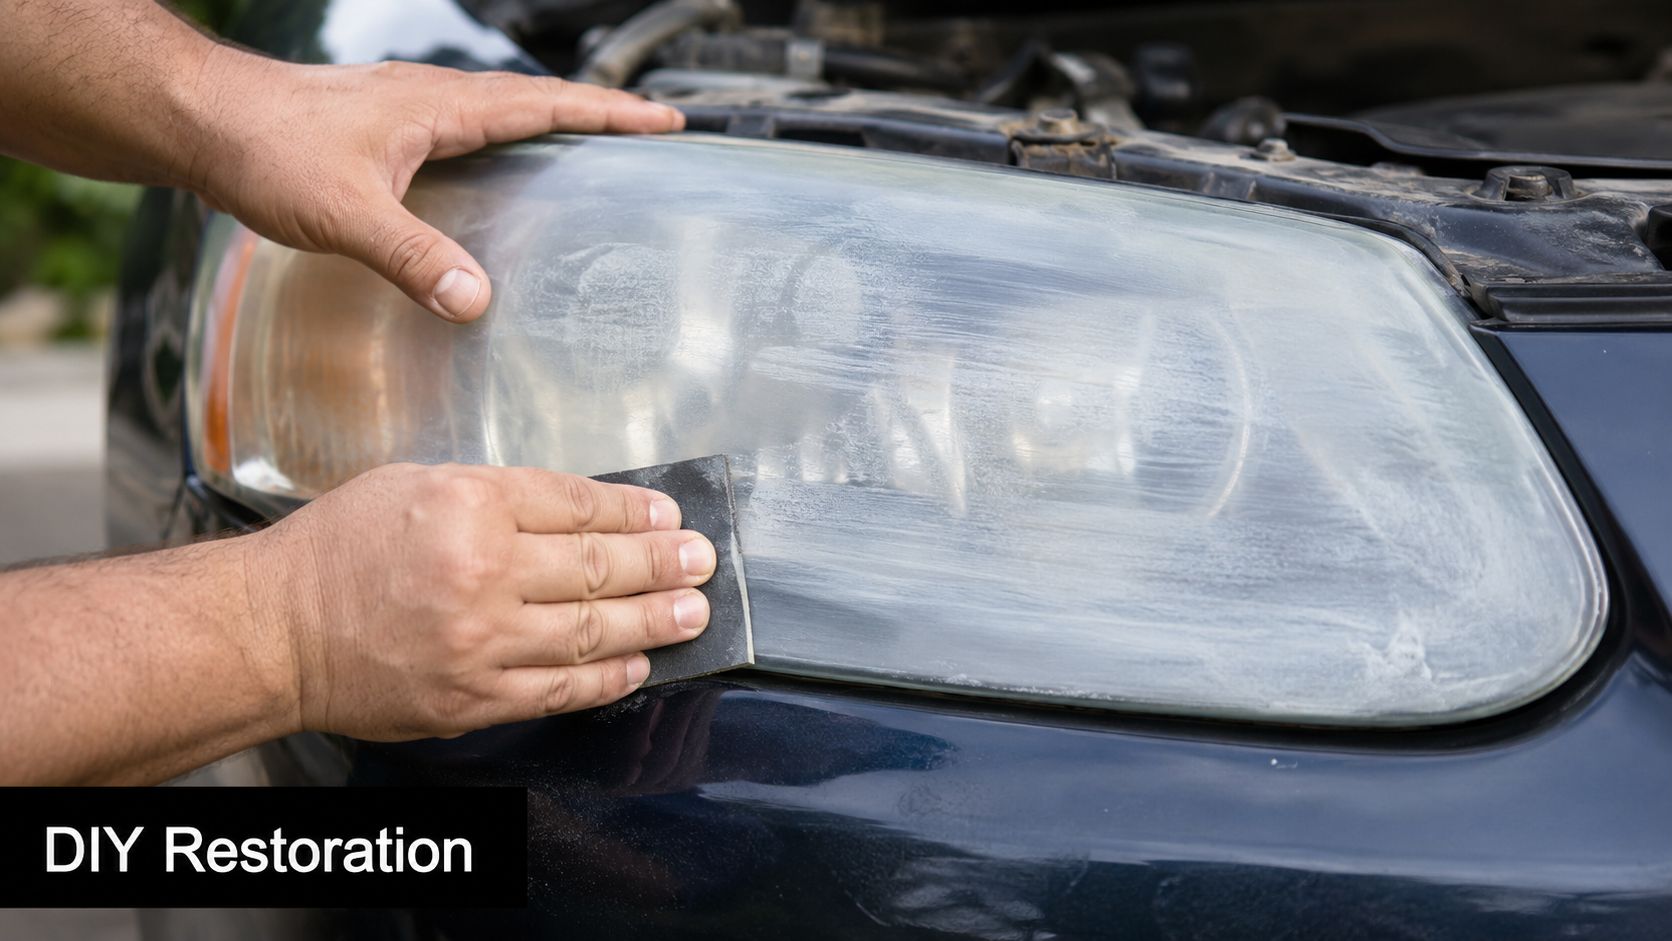
An Overview of the DIY Restoration Process
DIY restoration isn't hard to understand, but it is easy to underestimate. People often buy a kit expecting a quick wipe-on fix, then realize halfway through that they're doing a miniature refinishing job on clear plastic.
Prep matters more than most people expect
Before sanding starts, the lens needs to be washed and the surrounding paint and trim need to be masked carefully. This isn't optional. Sandpaper that touches exposed paint can leave damage you didn't bargain for.
Clean working conditions matter too. Dirt trapped under an abrasive can create extra scratching, and leftover residue can interfere with the polishing and sealing stages.
For a practical look at what oxidation removal involves, this guide on how to remove oxidation from headlights is a helpful reference.
The work happens in the middle
The sanding stage is usually the longest part. You move from coarser to finer grit while keeping the surface wet. The lens often looks worse before it looks better, which causes a lot of first-time users to panic and stop early.
That foggy look after sanding is normal. The polishing stage is what brings the clarity back.
A visual walkthrough helps if you've never seen the process done start to finish:
The final step decides the lifespan
Once the lens is polished, it has to be fully clean and dry before the protectant goes on. The UV-blocking top coat should be applied in the shade or in controlled conditions, then left to cure according to the product instructions.
Here's the part many people miss. The restored clarity is not the finish line. It's the setup for the protective coating. If the coating goes on too soon, too unevenly, or in bad conditions, the lens may look good for a short window and then decline quickly.
Common DIY problems include:
- Rushed masking: Sanding marks on paint or trim.
- Uneven pressure: Patchy correction across the lens.
- Skipping a grit: A frosted look that polish can't fully remove.
- Poor drying before sealant: Weak bonding and shorter life.
- Applying in direct sun: Premature curing and weaker protection.
That's why this job feels simple on paper but mixed in practice. The process is straightforward. The execution is what separates a clean result from one that needs to be redone.
How to Maintain Your Restored Headlights
Once the headlights are clear again, maintenance decides how long they stay that way. This applies whether you used a kit at home or had the job done professionally.
The first habit is simple. Wash the lenses regularly. Bug residue, road film, bird droppings, and chemical fallout sit on the surface and wear on the protective layer over time. Clean headlights don't just look better. They give the coating a better chance to last.
Easy habits that help
- Use gentle wash methods: Harsh abrasives can shorten the life of the finish.
- Protect the lens during routine detailing: A wax or sealant on the headlights adds another sacrificial layer.
- Park out of direct sun when possible: Less UV exposure means slower degradation.
- Pay attention to early signs: If you notice fresh dullness, address it before full haze returns.
Freshly restored headlights still need protection. Restoration resets the surface. It doesn't make the lens immune to sun and weather.
A little upkeep goes a long way here. Most failed restorations don't fail all at once. They slowly lose protection, then the haze returns.
Frequently Asked Questions
A driver usually asks these questions after the first disappointment with a DIY kit. The headlights looked better for a few weeks or a few months, then the haze started creeping back. That is the right time to ask not just whether a kit works, but how long the fix is likely to hold.
FAQ on Headlight Restoration
| Question | Answer |
|---|---|
| Do headlight restoration kits actually work? | They can improve clarity and light output when the damage is limited to surface oxidation. Results depend on how degraded the lens is, how complete the sanding and polishing steps are, and whether the kit leaves behind real UV protection. |
| How long will a DIY restoration last? | Usually, that depends less on the polish and more on the protection applied at the end. A basic wipe-on finish may look good at first and fail sooner than expected. A carefully applied coating lasts longer, but DIY results still tend to be less durable than a professional restoration with better surface prep and a stronger protective layer. |
| Is toothpaste a real substitute for a kit? | No. It can remove some grime and mild oxidation, but it does not correct deeper damage or add UV protection. The lens may look a little better briefly, then fade right back. |
| Can I restore any cloudy headlight? | No. Surface oxidation is repairable. Internal haze, cracking, delamination, heavy pitting, or heat damage usually will not polish out, and some lenses are far enough gone that replacement makes more sense. |
| What if my headlights look clear but still seem dim? | Check the bulbs, electrical output, and reflector condition before blaming the lens. Clear plastic does not guarantee strong light. On some vehicles, weak bulbs or worn internal components are the real problem, so a restoration kit will not fix the issue. |
| Is professional restoration worth it? | Usually yes, especially for owners who care about durability. Professional work costs more upfront, but it often lasts longer, looks more even, and avoids common DIY failures like uneven sanding marks, patchy clear coat, or early return of oxidation. |
The short version is simple. DIY kits can be a good temporary fix. Professional restoration is the better choice if the goal is a cleaner finish and a result that holds up longer in sun, washing, and daily driving.
If your headlights are foggy, yellowed, or just not performing the way they should, GP Mobile Car Wash & Detail offers headlight restoration as part of its detailing services in Lincoln, Nebraska. For drivers who want a longer-lasting result without the trial and error of a DIY kit, it is a practical option to consider.